Salesforce Flow Credit Card Application
Credit Card Application
- Build a screen form (two columns with conditional fields)
- Create an Account record
- Create a Contact record (and link to account)
- Create an Opportunity (and link to account/contact)
- Depending on card type and the limit applied for:
- Automatically approve -OR-
- Create a case for credit checking (linked to Opp)
- Case owner performs a credit check
- Case owner Approves/rejects Opportunity (closed/won or closed/lost)
- Close Case Advise applicant of approval/rejection by email
Before we start building flows:
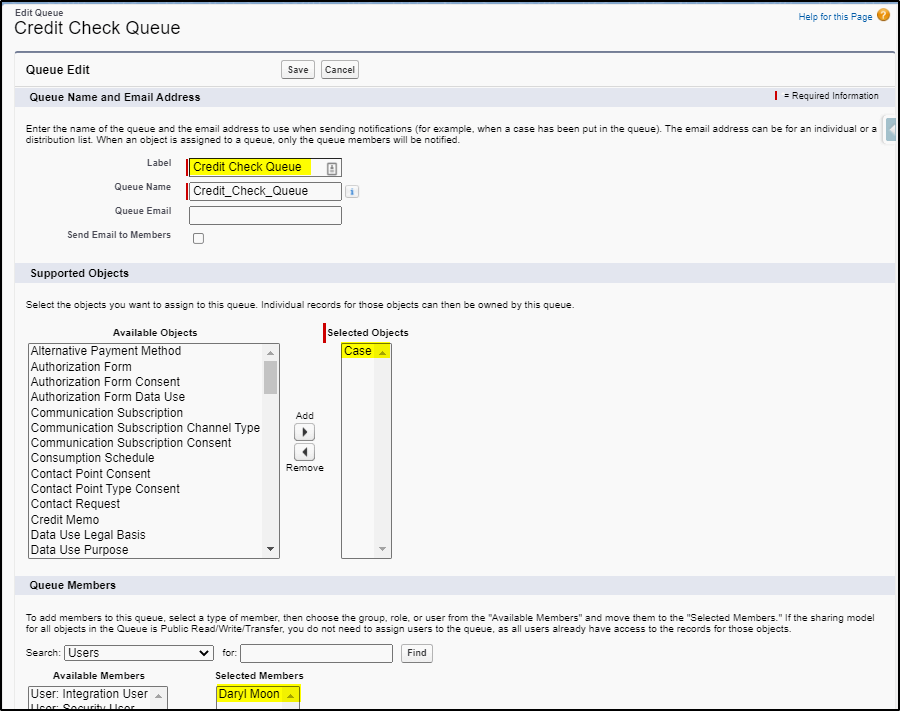
- Create queue “Credit Check Queue” for cases
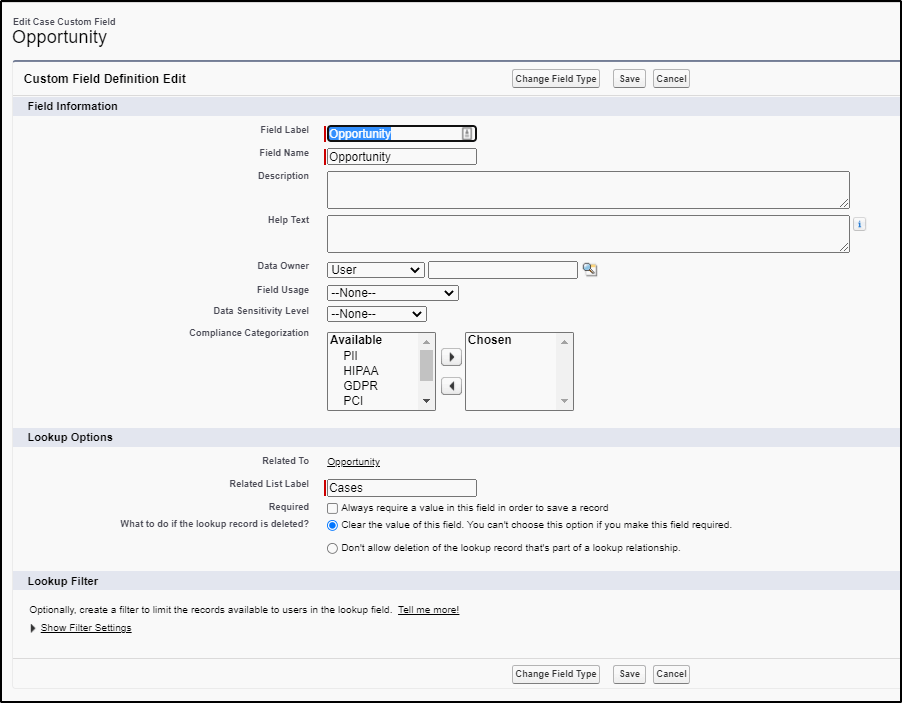
- Add new Lookup on Case to Opportunity
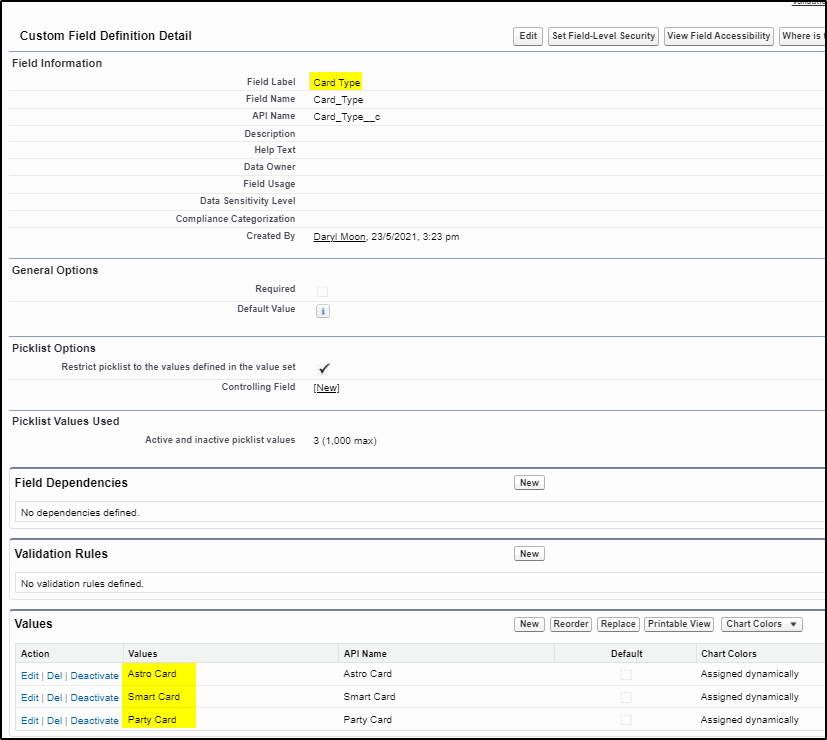
- Create a Card Type picklist on Opportunity
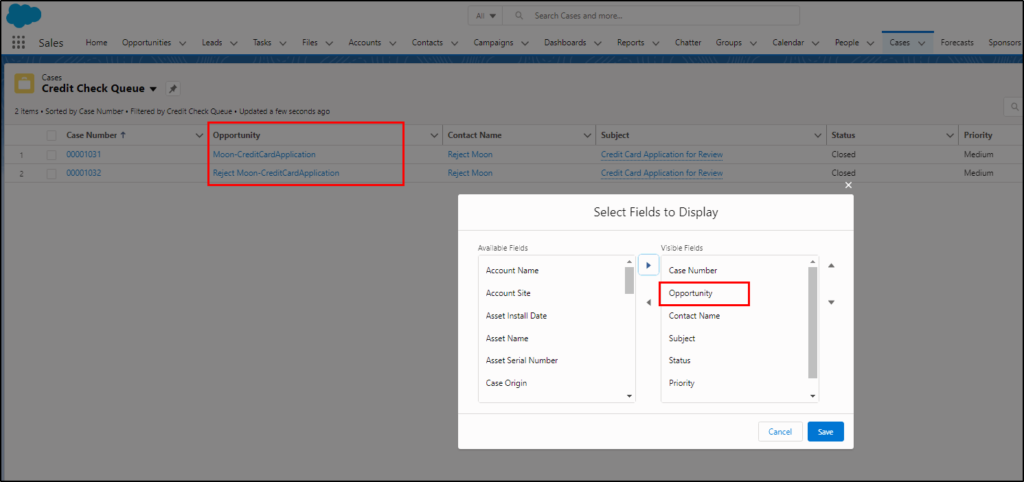
- Update Case list view for “Credit Check Queue” to include Opportunity
- Upload images for cards to static resources
- Install and Configure Flow Magic
- Configure card images for Card Type picklist
Create a new Queue:
Setup -> Queue
Create Lookup between Case and Opportunity
Setup -> Object Manager -> Case
Add a new field of type lookup to the Opportunity object. This will relate the opportunity to a case.
Create a new picklist field on Opportunity
Setup -> Object Manager -> Opportunity
Configure the Case List View for Credit Check Queue
Add the Opportunity field:
Right click and Download these three (3) images and save to your computer:


Continue your preparation
Upload the three (3) images to Static Resources
Name them:
- astro_card
- smart_card
- party_card
Setup -> Static Resources
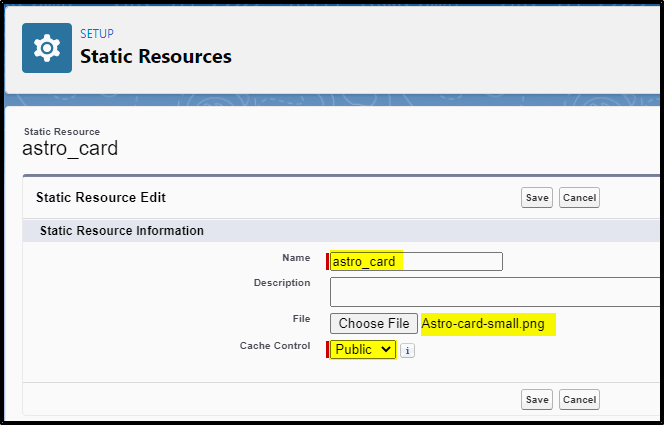
Make sure you set the Cache Control to Public.
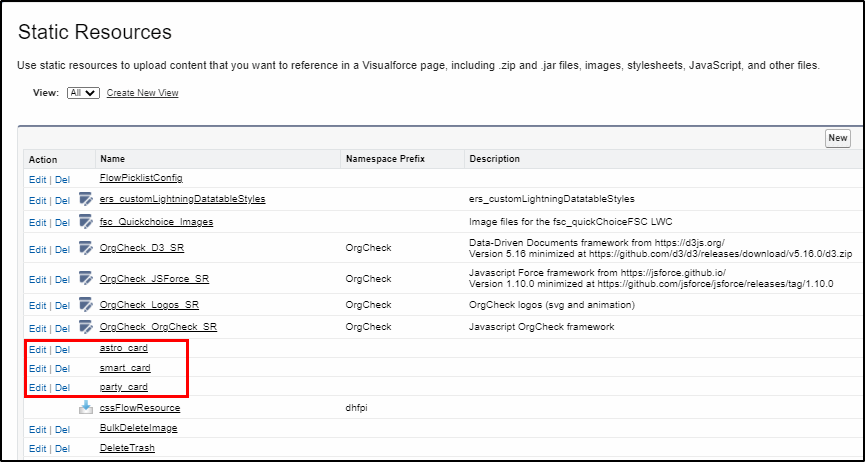
When completed, you should have three images
Install the Flow Magic App from the App Exchange
Here is the installation link for the package.
Install the Navigation Button from Gravity Labs
Install the Navigation Button app from here.
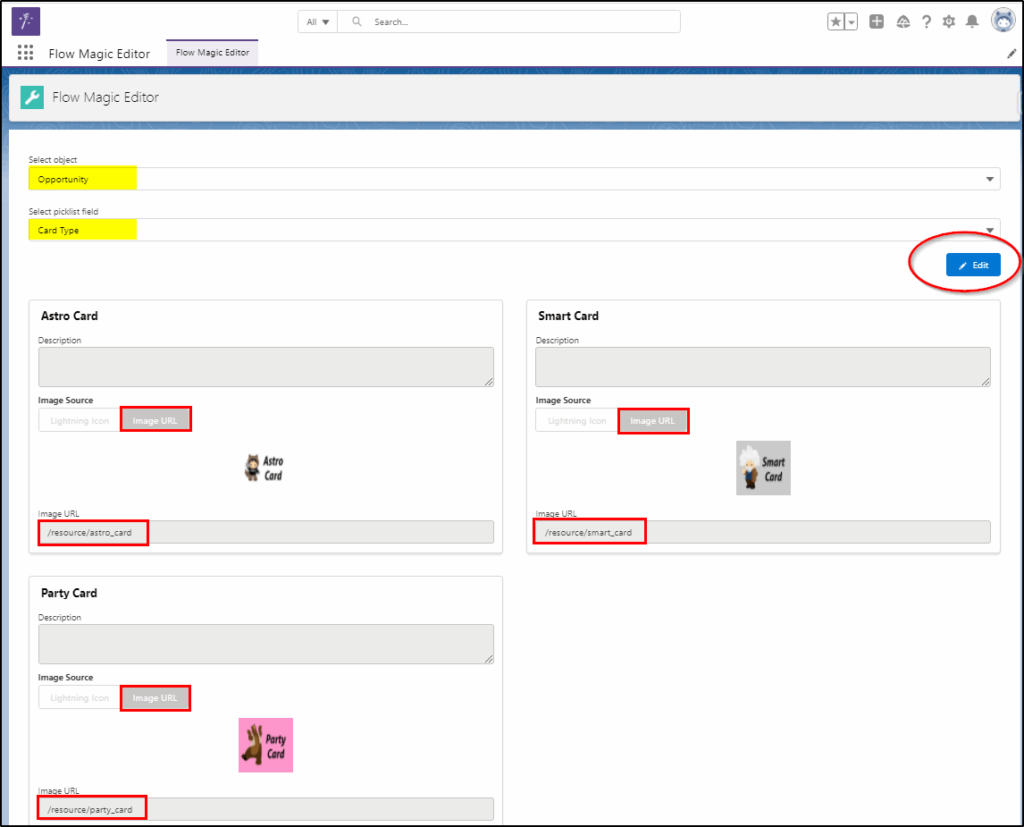
Run the Flow Magic Editor (app)
Select the object: Opportunity
Select the picklist field: Card Type
Click edit and change the Image Source to: Image URL
Enter the URL as shown for the three images
Click Save.
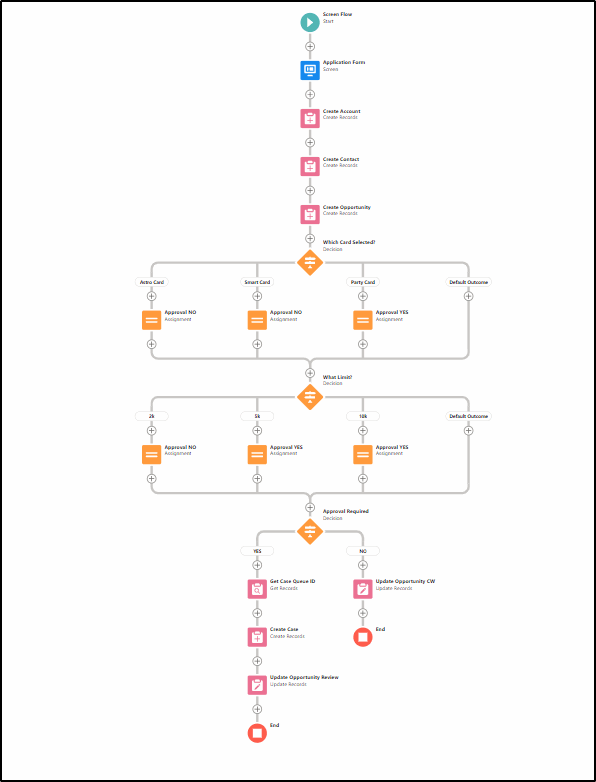
1st Flow: Credit Card Application
This is the Screen flow we will create first:
Start Flow and create a new Screen Flow
Setup -> Flow
Select Screen Flow:
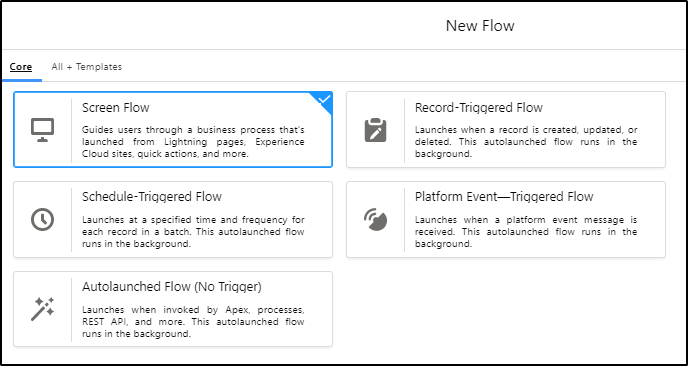
Select Auto Layout:

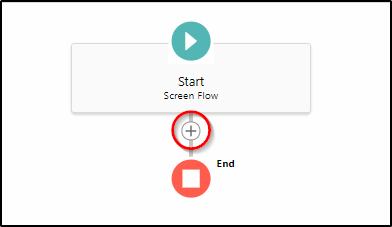
Add a new Screen element to the page by clicking the “+” sign under start.
Complete the properties for this screen, note we removed both Show Header and Show Footer.
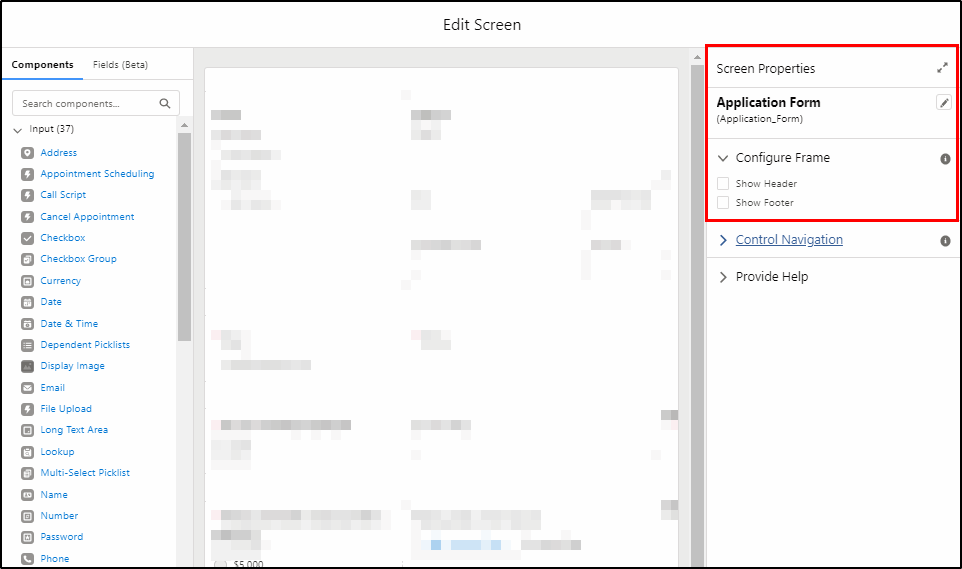
Save the form we will come back to it shortly.
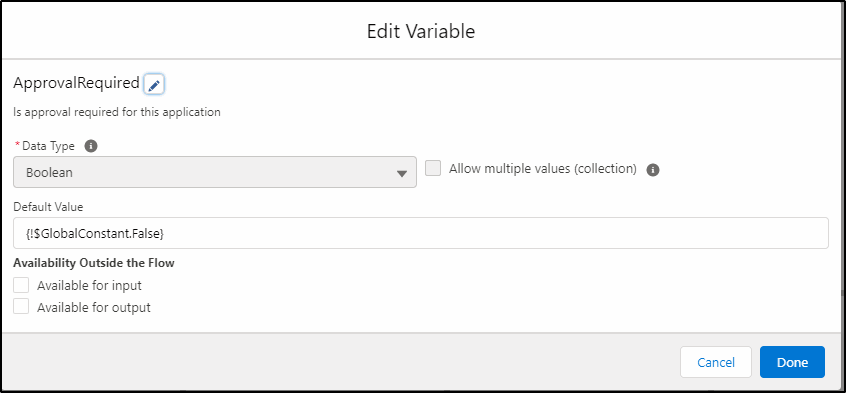
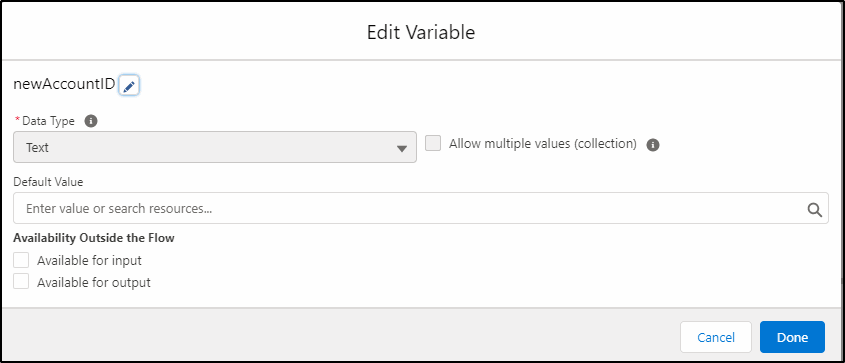
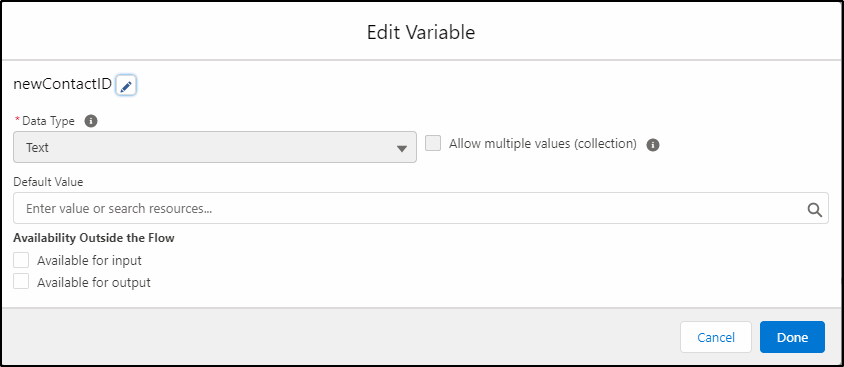
Create these three variables:
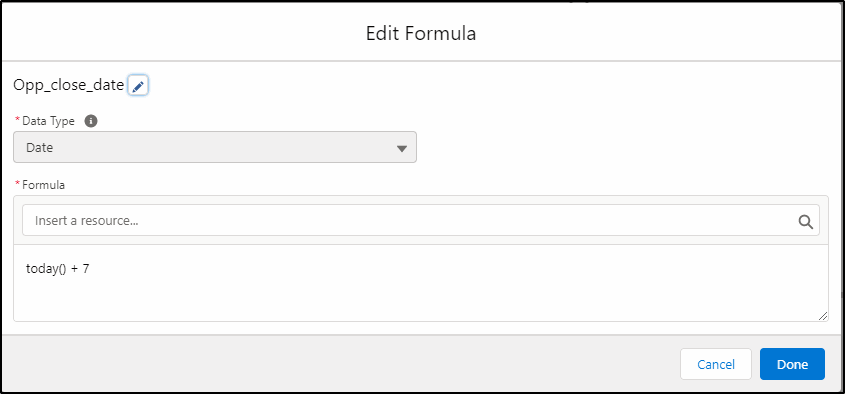
Create this formula:
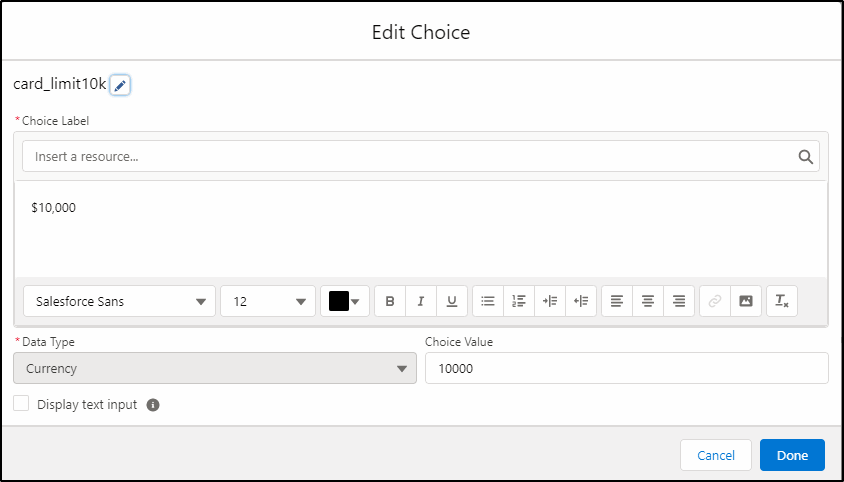
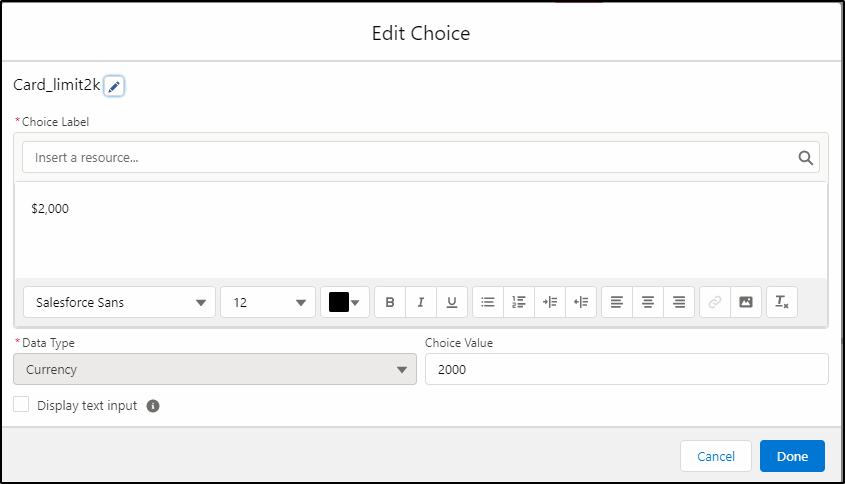
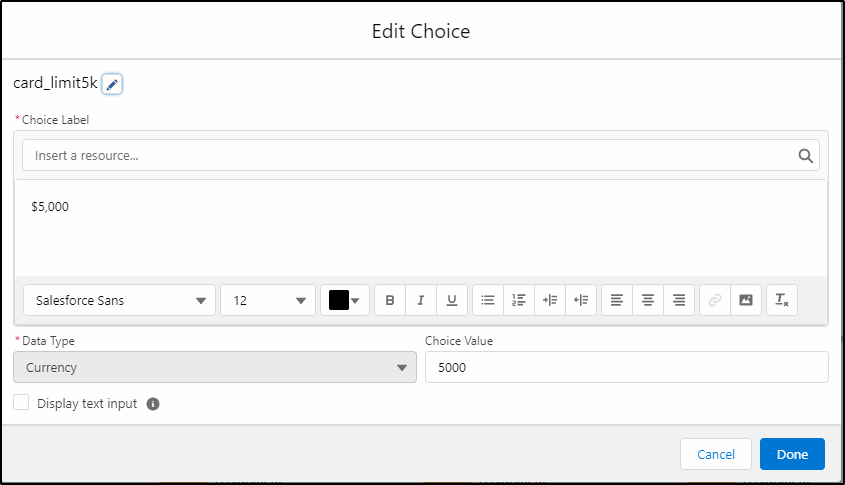
Create these choice values:
New Resource: Choice
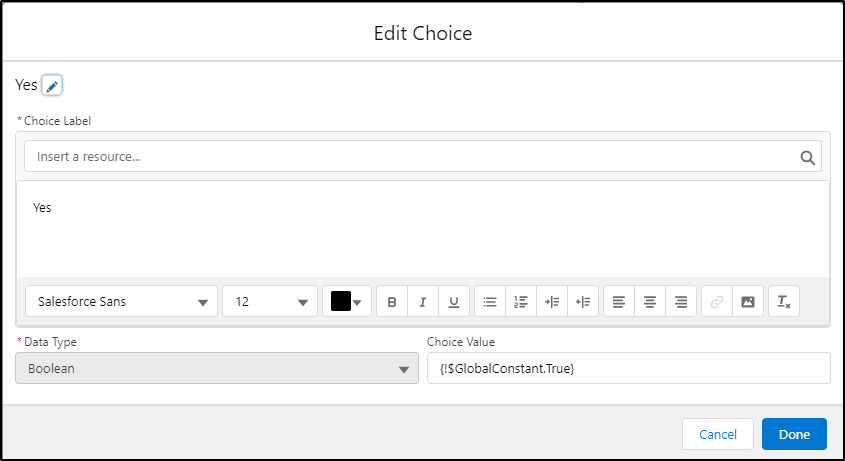
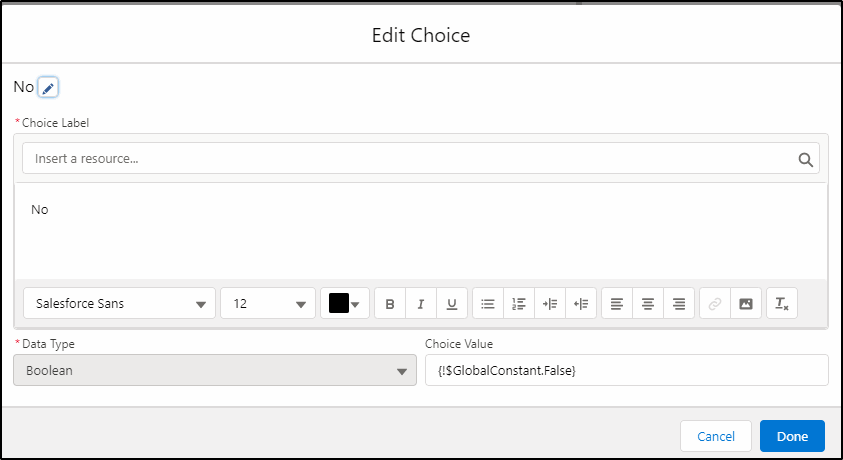
Note: The first three are currency data type and the next two are Boolean.
Boolean choices:
Create New Sections on the Page
Drag a new Section to the canvas:
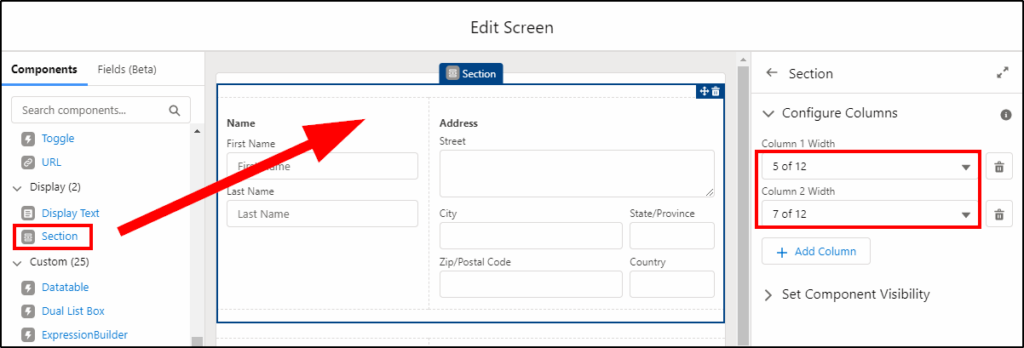
Configure two columns, one with a width of 5 units and the other with 7 units.
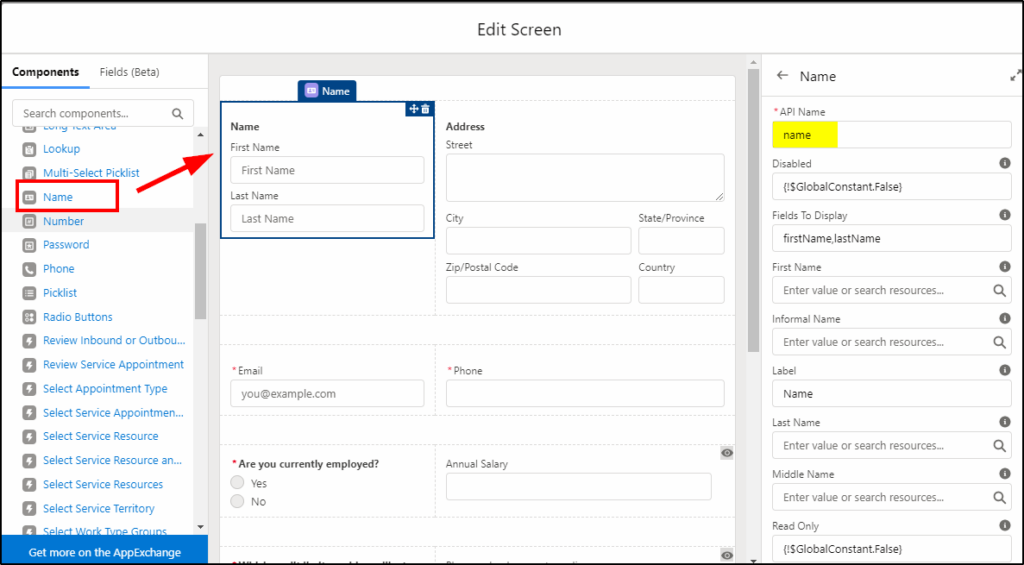
Drag a Name field to the canvas and place it in the left column:
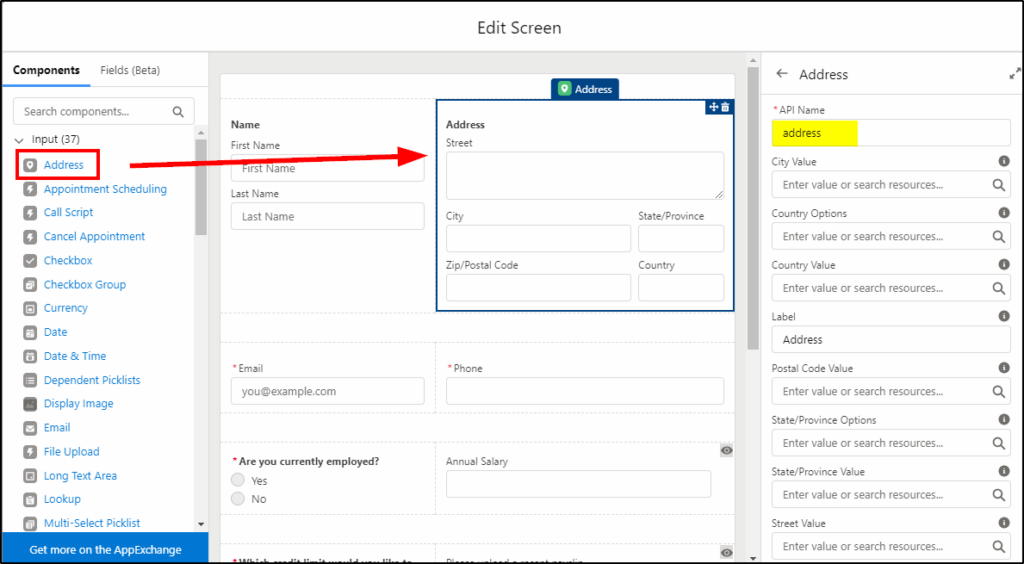
Drag an address to the right column:
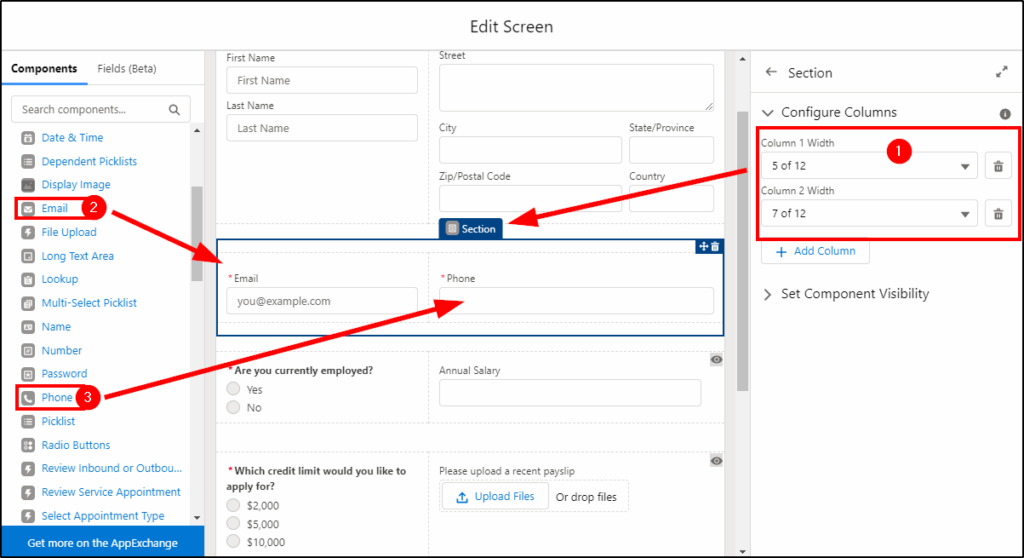
Create another new section and add email and phone fields:
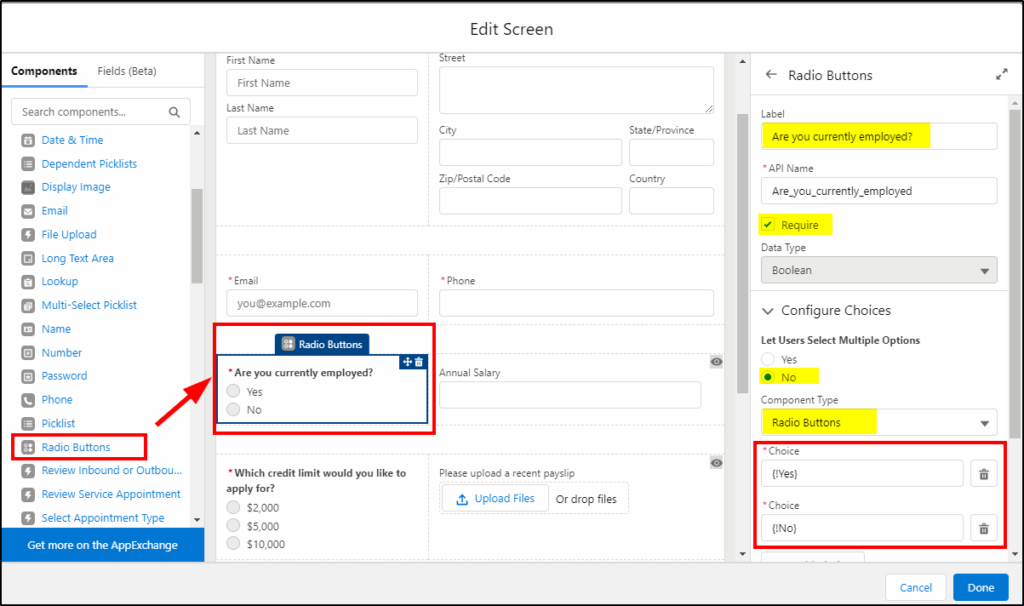
Create another new 2 column section and add a Radio Buttons field to the left, configuring as follows:
Note: Here we use those two choice values we previously defined.
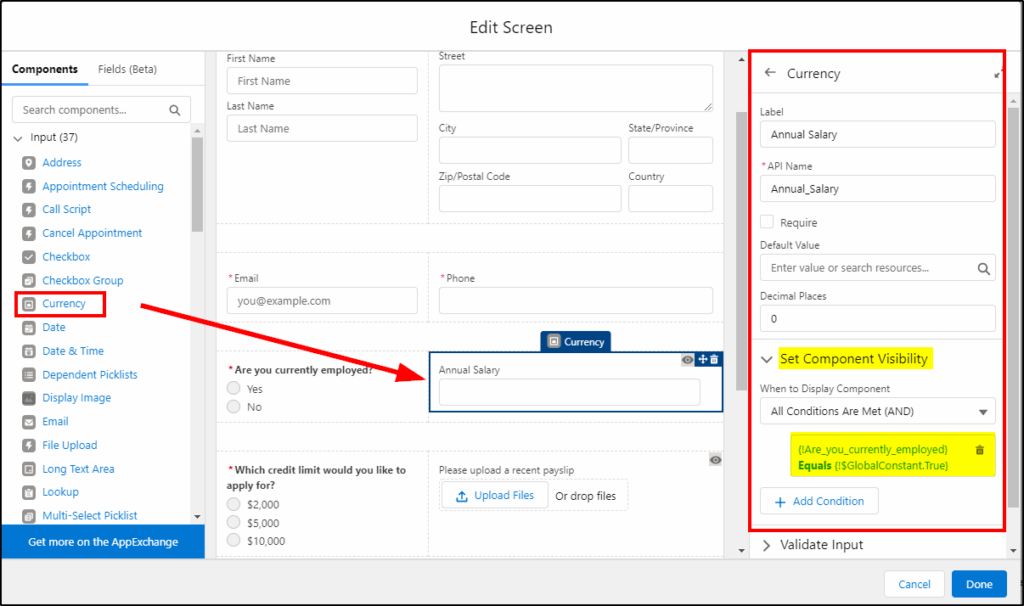
Add a currency field and configure as follows:
Note: The use of the Component Visibility to only show this field if the applicant is currently employed.
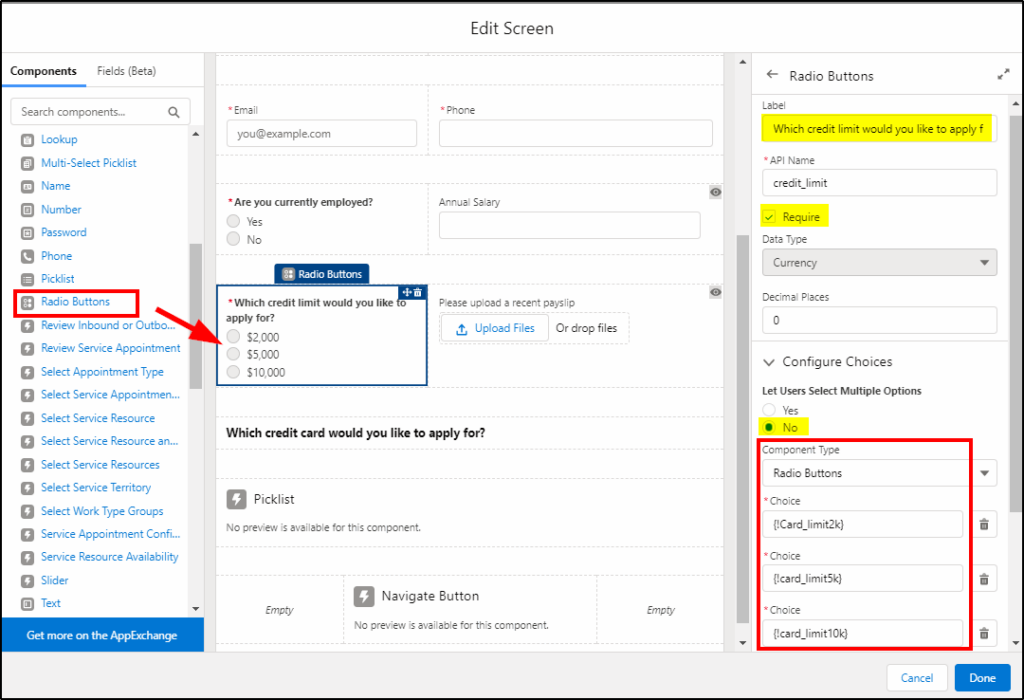
Add another new 2 column section and drag Radio buttons to the first column, configured as follows:
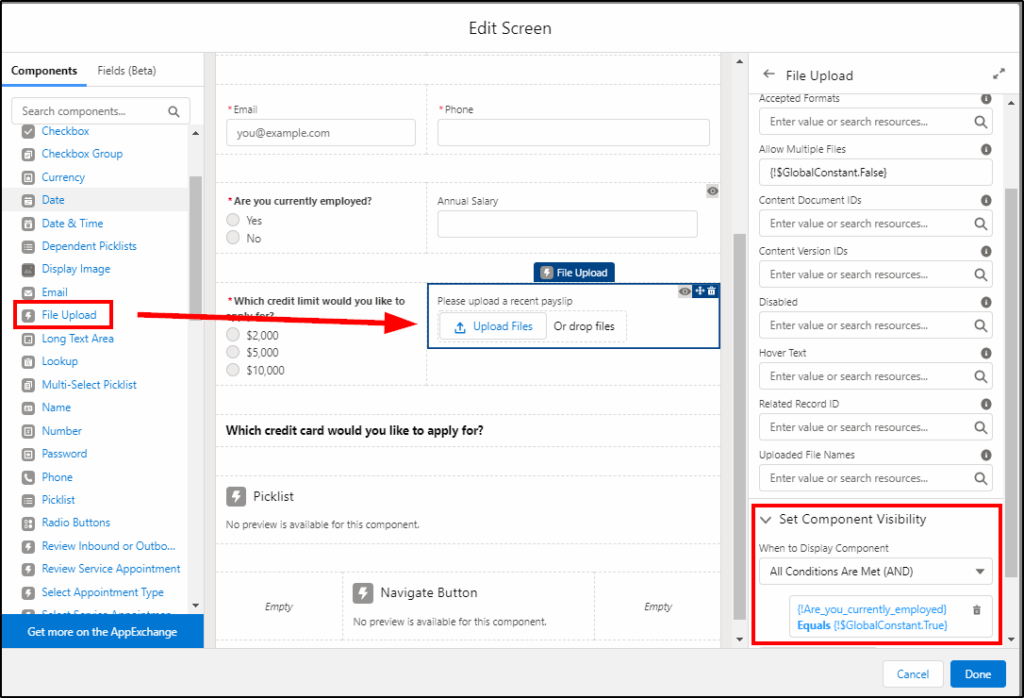
Drag a File Upload field to the second column:
Note: We use conditional formatting to only display if the applicant is currently employed.
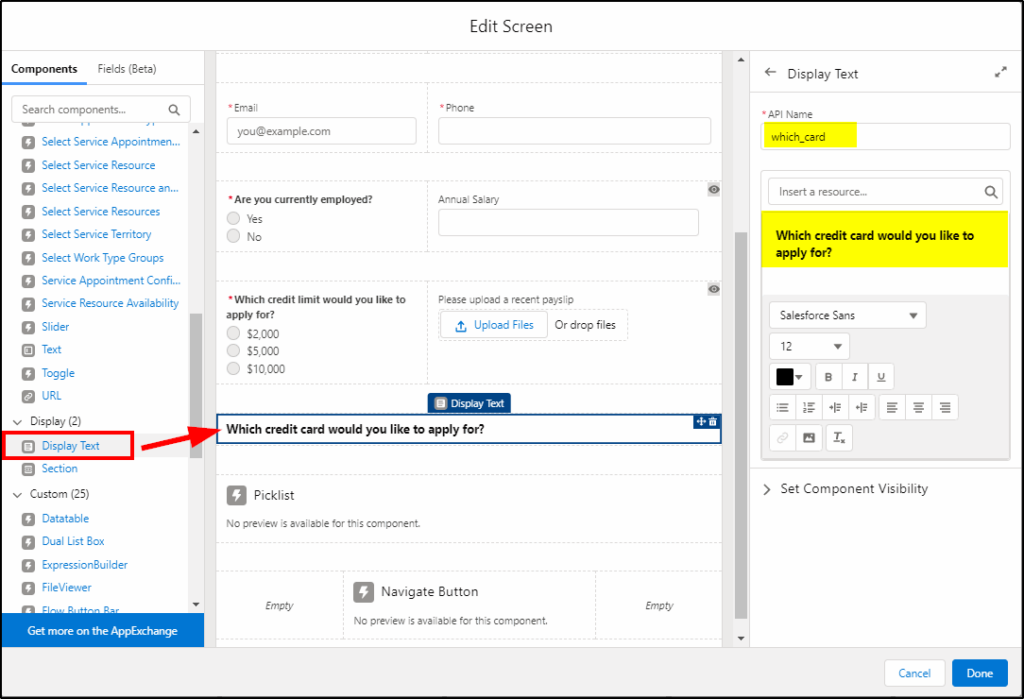
To create the heading label, drag a Display Text field to the canvas:
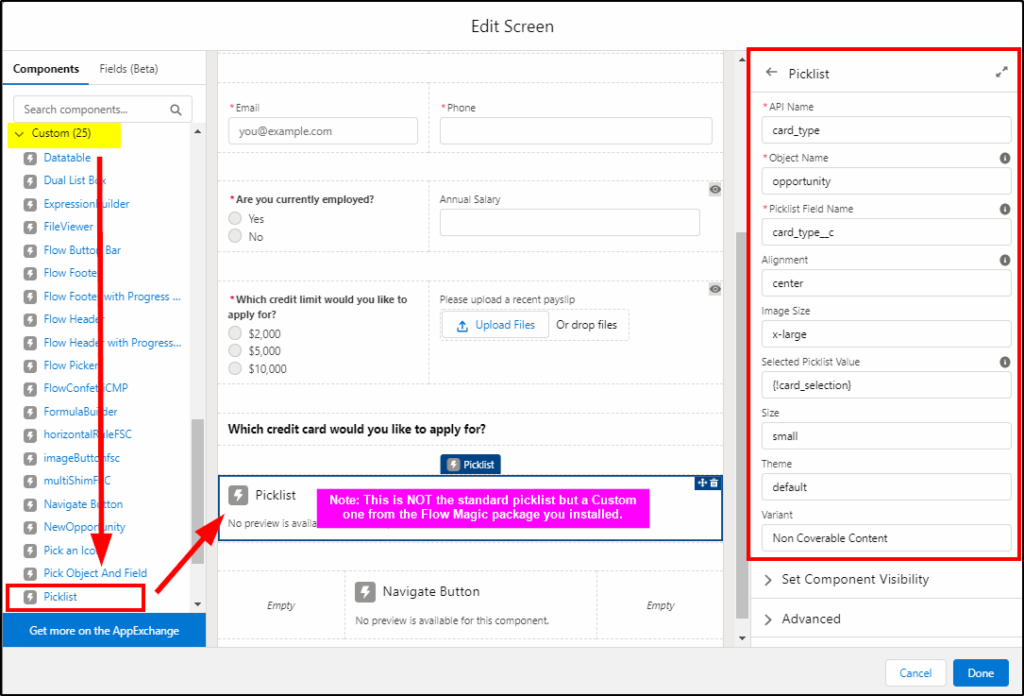
Next, you need to scroll down the components list to find the custom Picklist. This is a bit confusing as it has the same name as the standard one!
To finish off our form, drag a new section and create three columns:
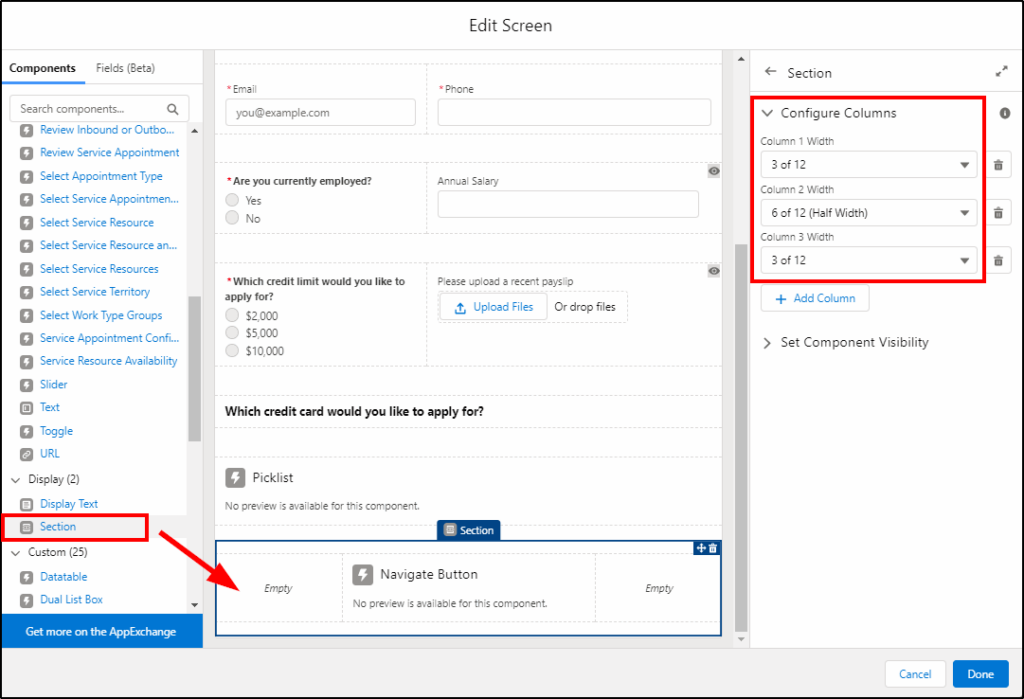
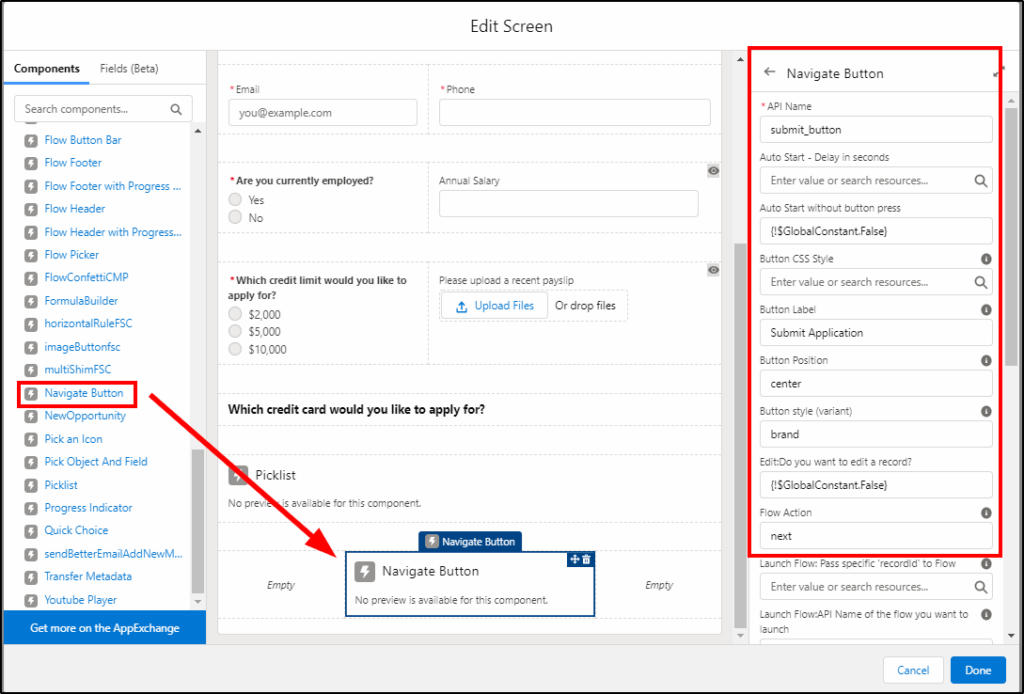
Drag the Navigate field into the middle section to centre our button.
Now you can click done, the hardest part of the flow is done!
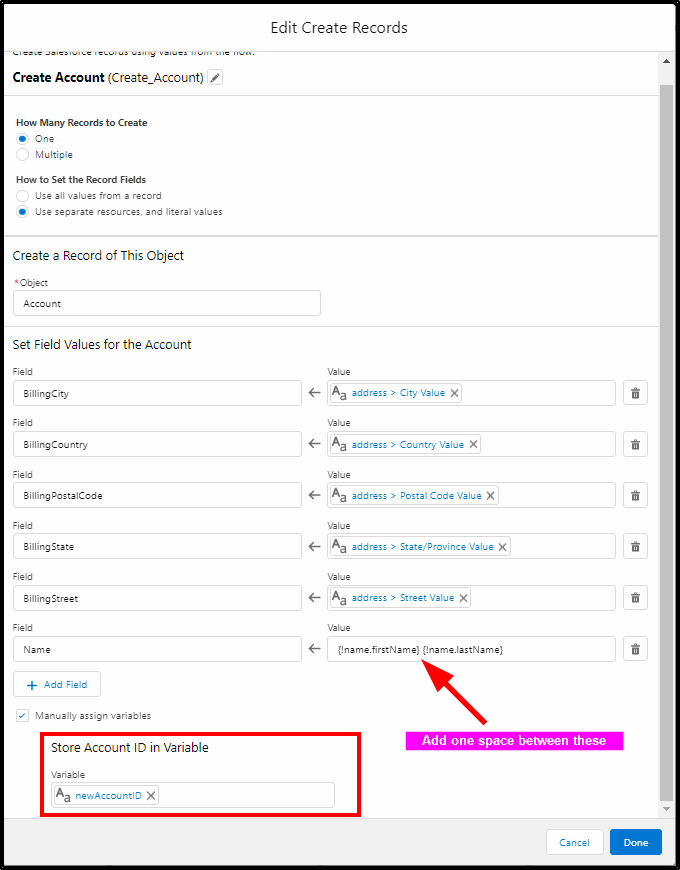
Add a Create Records element and configure as follows:
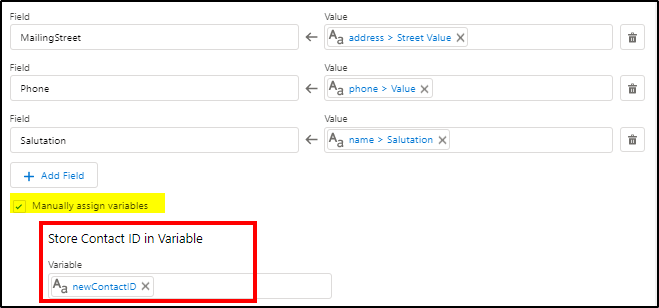
Add a create records element to create the Contact record and configure as follows:

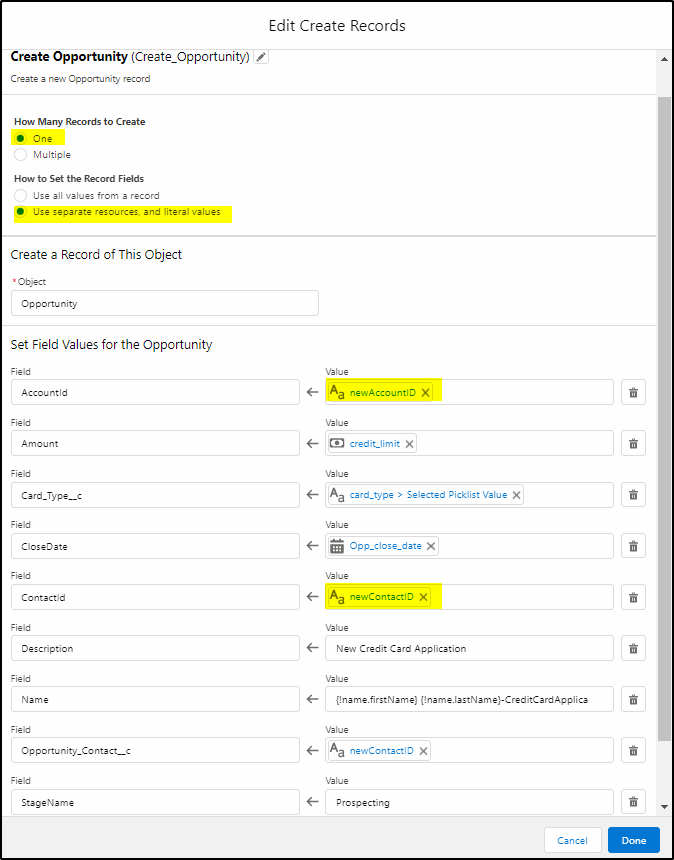
Create the Opportunity record as follows:
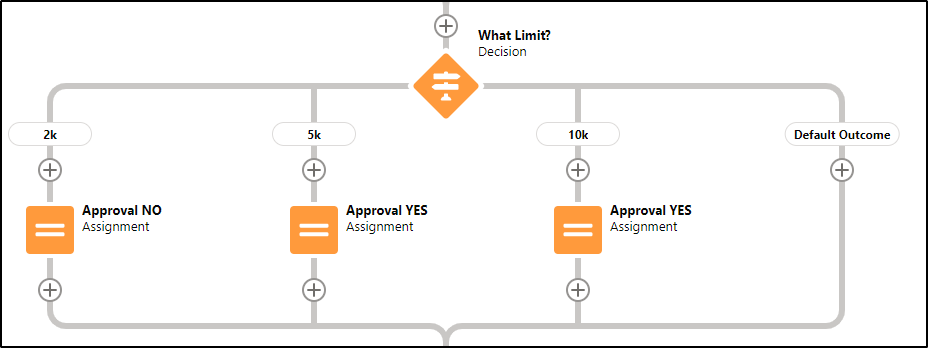
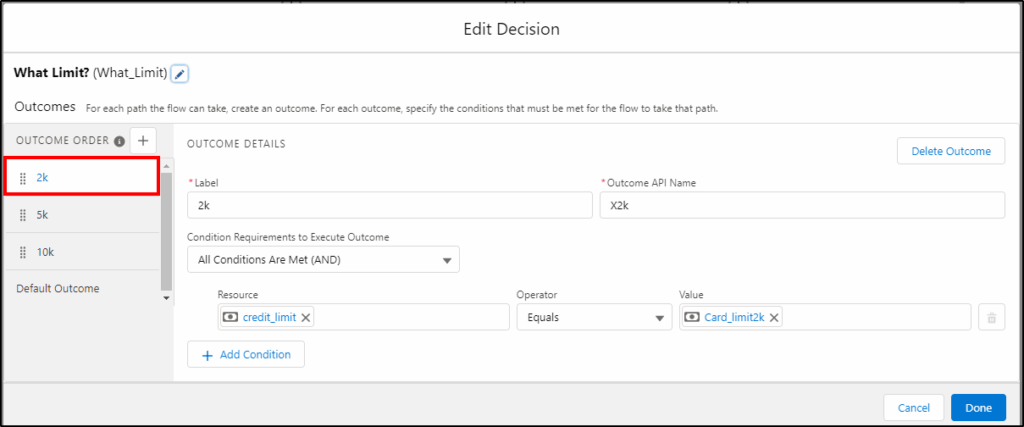
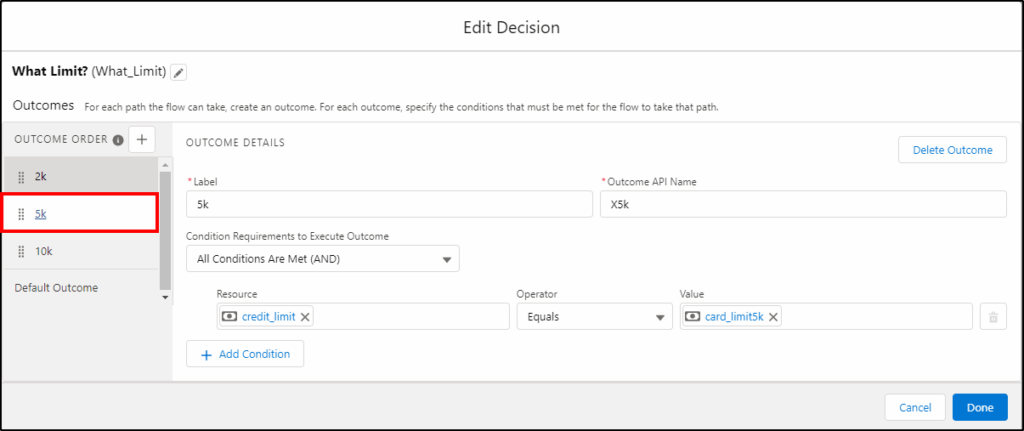
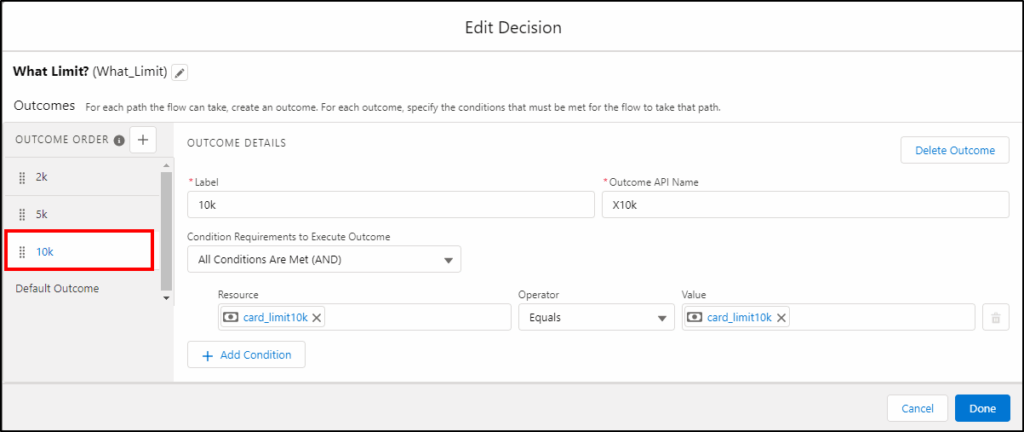
Create a Decision
This is the first decision we need to configure:
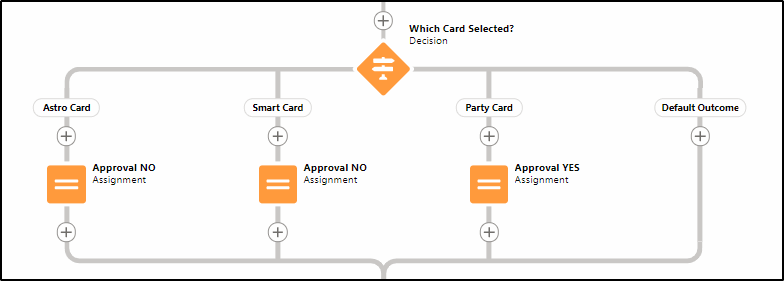
Add a new Decision element and configure as follows:
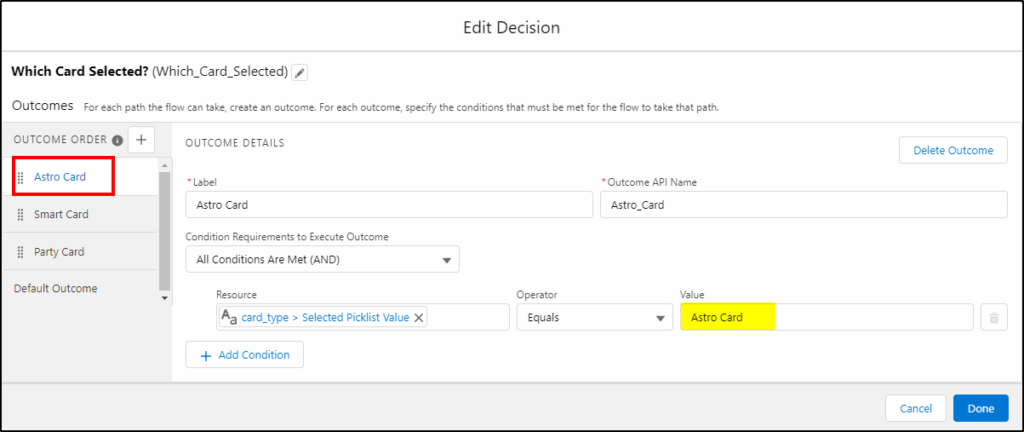
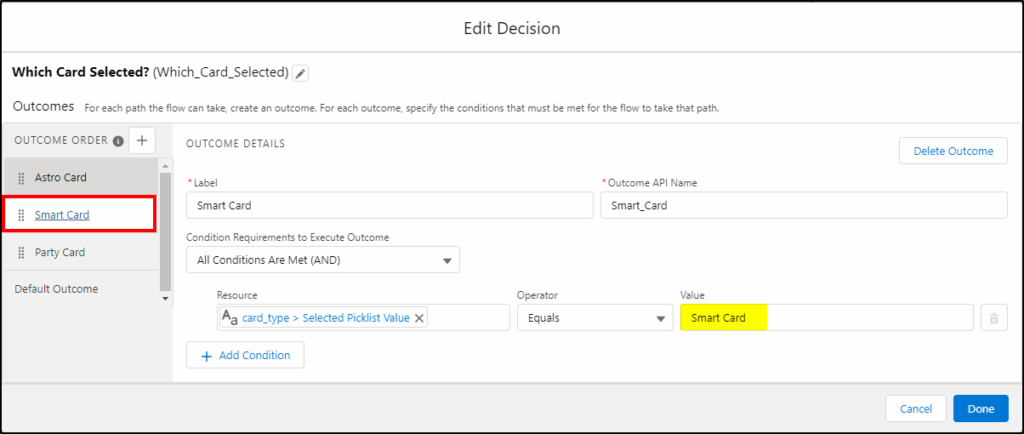
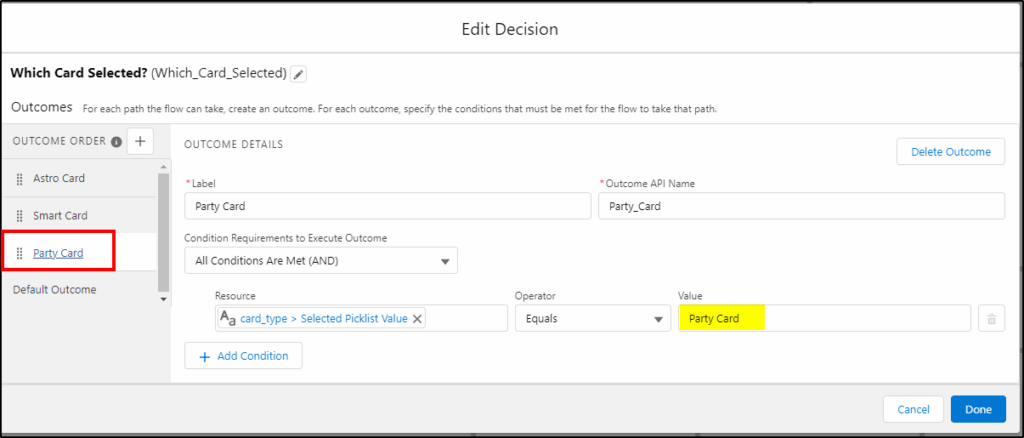
Click Done to save
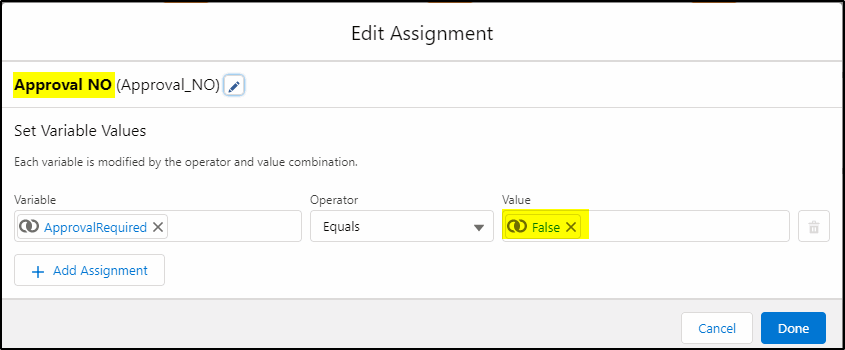
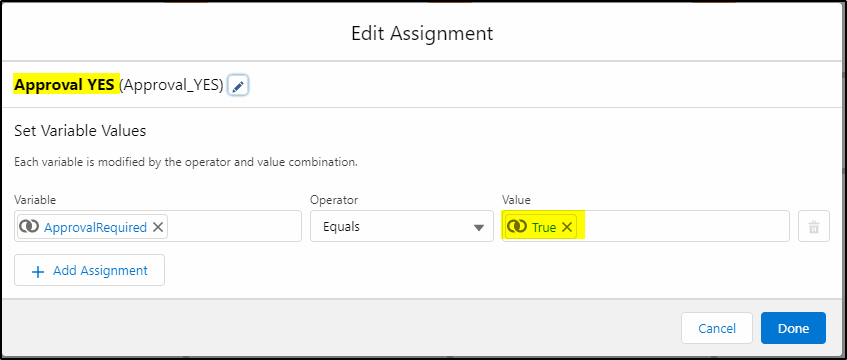
Add Assignments
For each decision add either the Approval NO or Approval YES Assignments:
(refer to the first diagram)
No Approval required:
Yes Approval is required:
(only required for the Party Card)
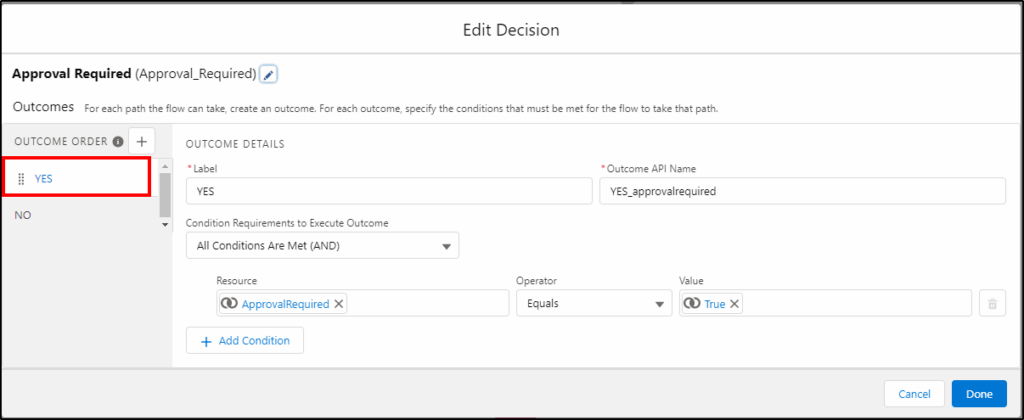
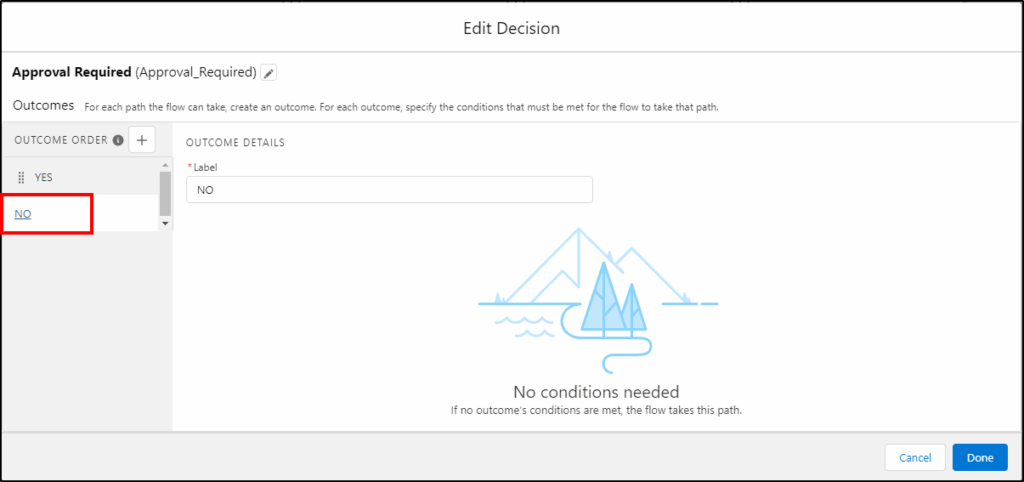
Create another Decision Element
Configure as follows:
Add Assignments
Add the YES/No assignments we did on the previous decision.
Add the Final Decision Element
Based on the Approval Required variable, what do you want to do next?
Save
The YES Branch
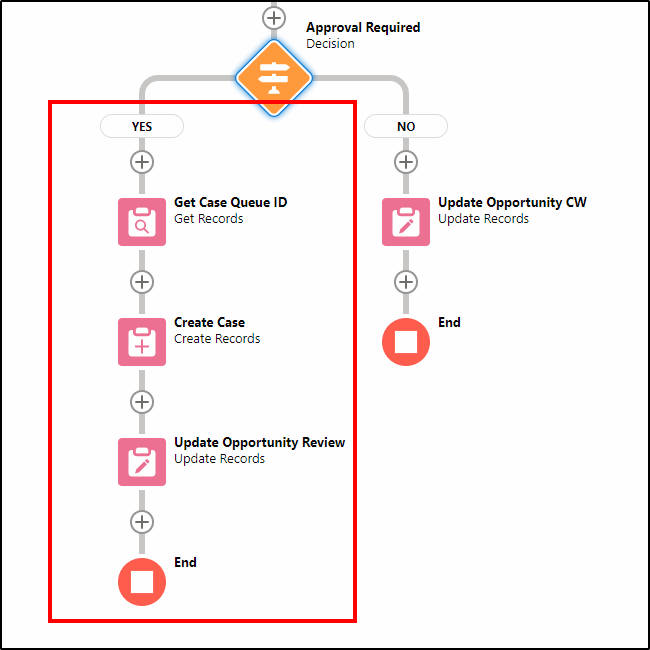
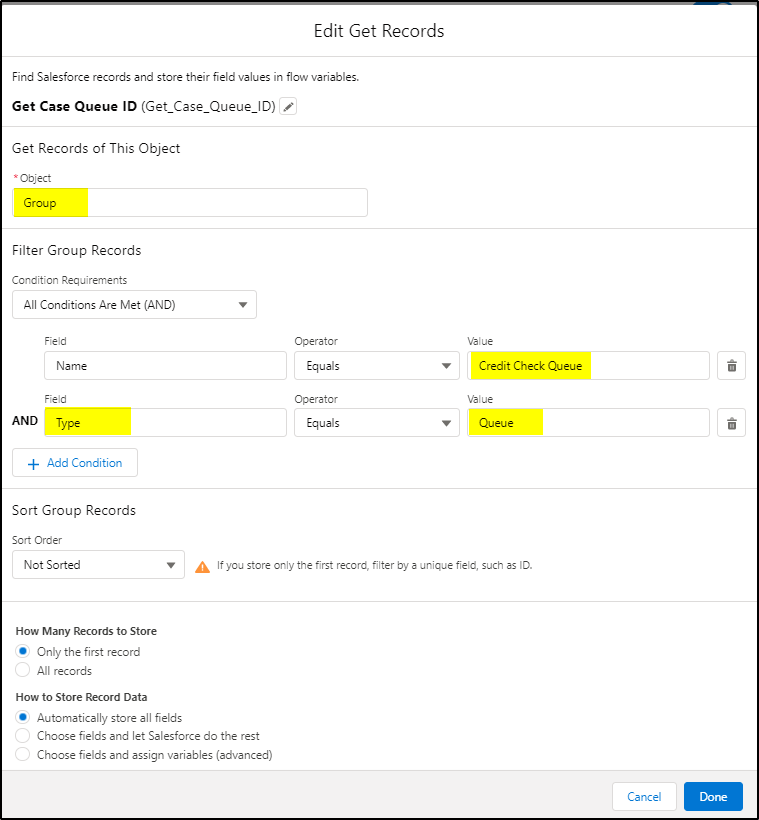
Get the Case Queue ID
To be able to add the case to the Queue you need to know the ID of the queue first.
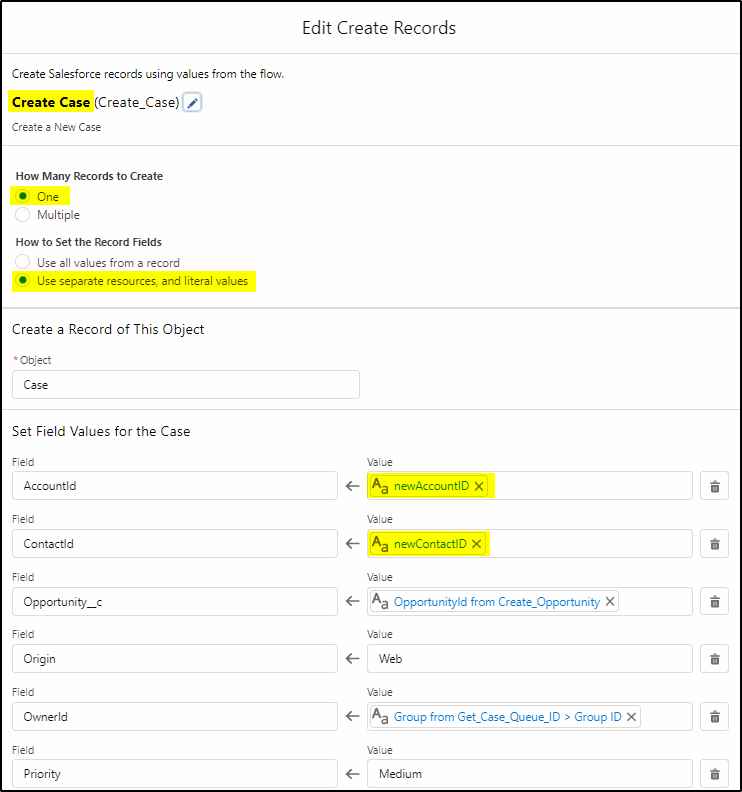
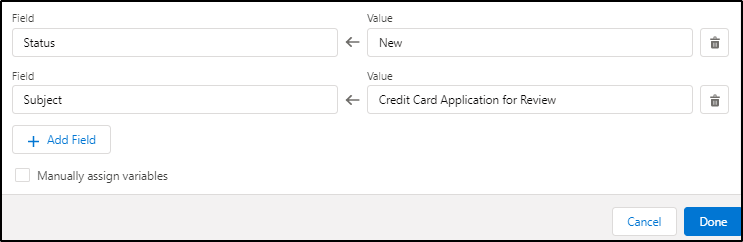
Create the Case
Create the case record and assign to the queue:
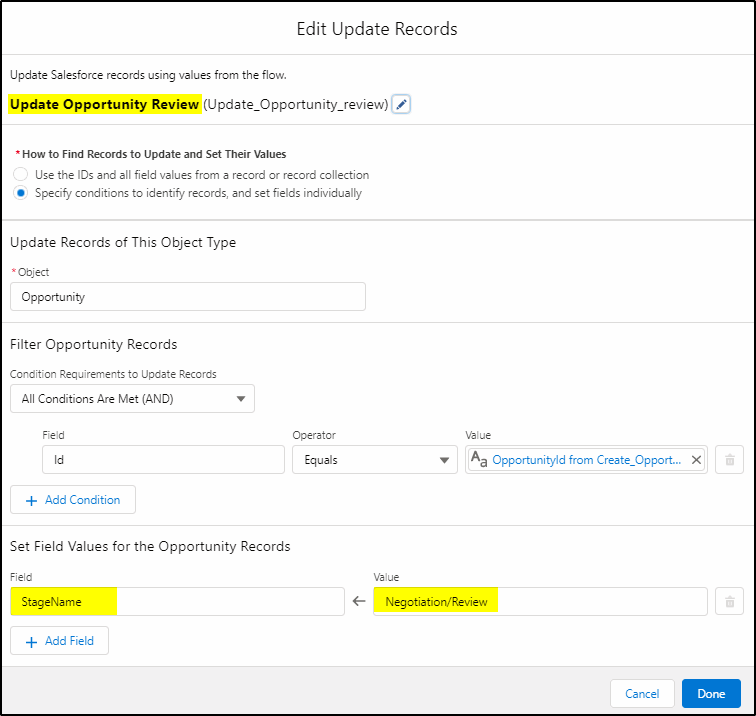
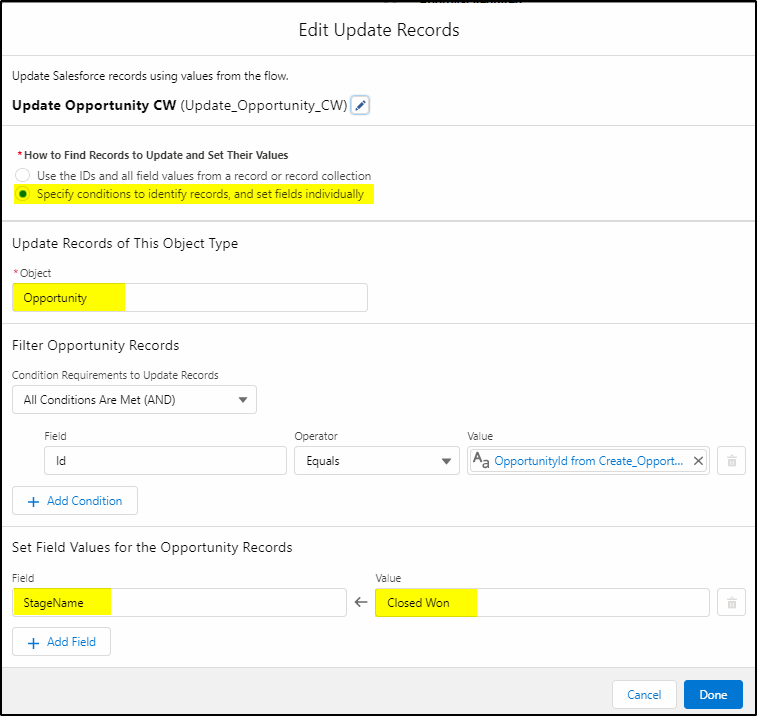
Update the Opportunity
Update the Opportunity stage to Negotiation/Review
Create the No Branch
The no branch is pretty simple:

Change the Opportunity to Closed/Won as it does not require any approval.
The flow is finished now so save it as: Credit Card Application
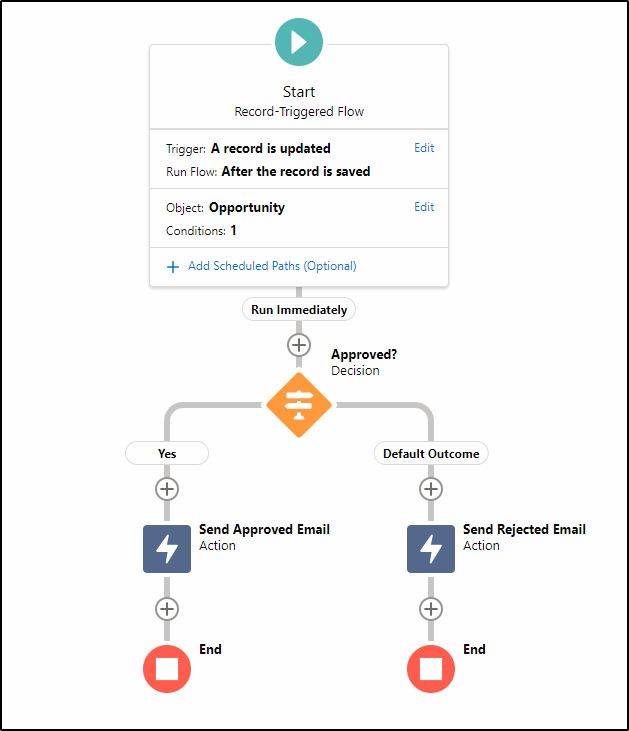
2nd Flow: Credit Card Approval
Credit Card Approval flow
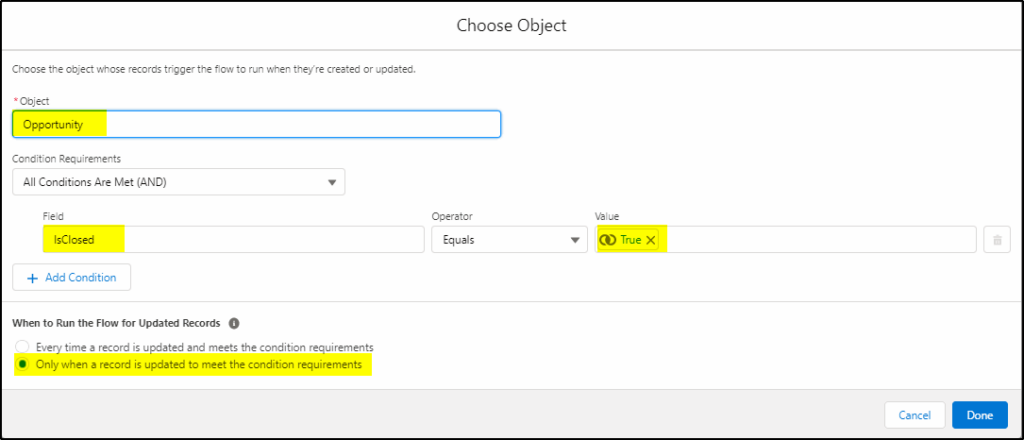
Create a new flow (Record Triggered).
We want this flow to start when an Opportunity is Updated and the stage is equal to Closed.
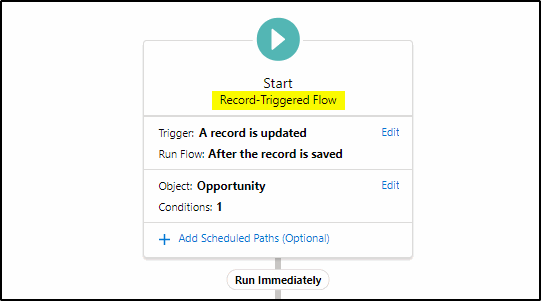
Triggered by when a record is updated and after the record save:
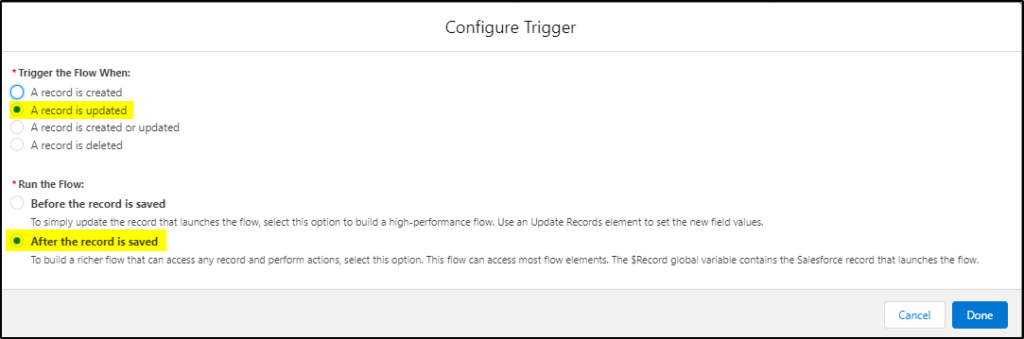
The Object is the Opportunity when it is set to Closed (but only the first time).
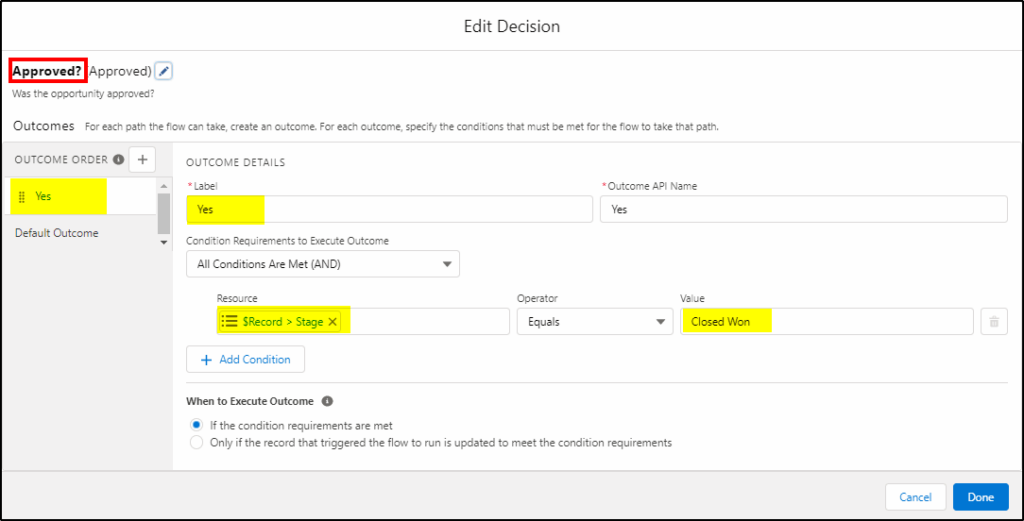
Add a Decision Element
The decision we need to check is was the Opportunity approved or not?
If approved, the stage will equal Closed/Won if rejected it will be Closed/Lost.
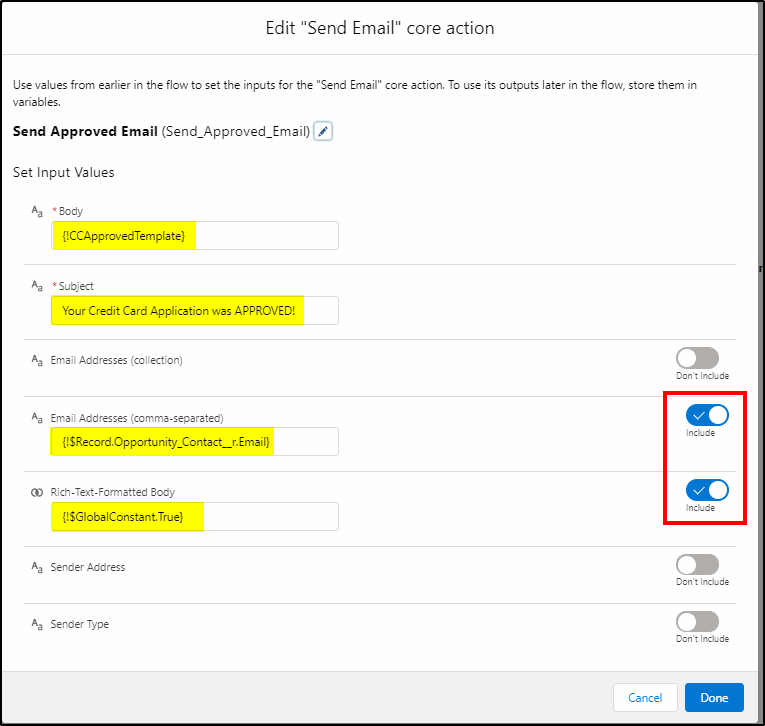
Send the Approved Email
First, we need to create a text template:
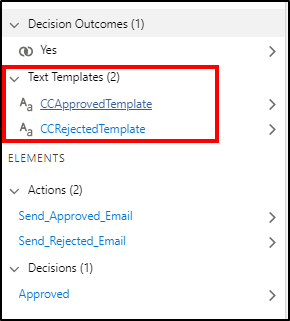
New Resource -> Text Template:
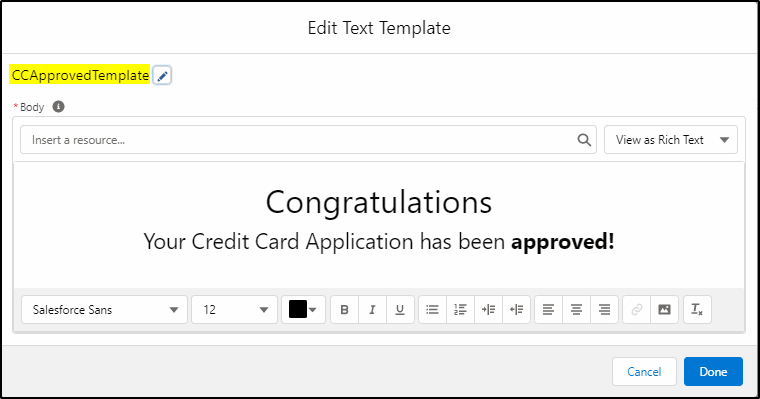
Now we can format the APPROVAL email:
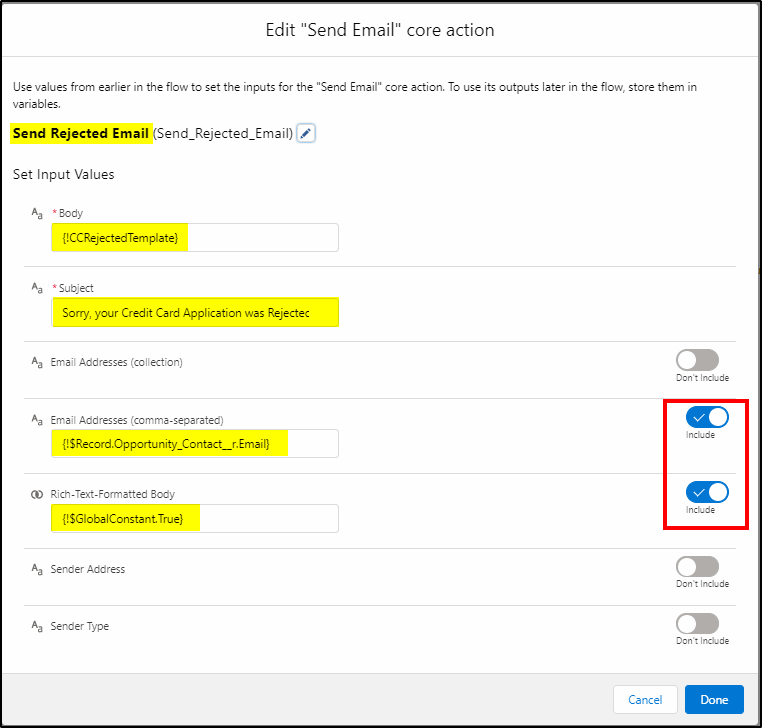
Format the REJECTED email
Create the text template:
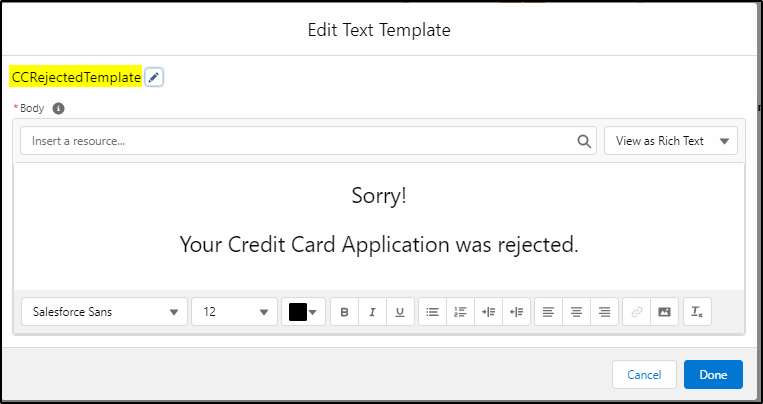
Format the email:
Save the flow as: Credit Card Approval
And now for the final tests!
Test 1 – Manual Approval
- Run the Credit Card Application flow (debug mode is fine) and enter a new record. Choose the 10k credit limit and any card type.
- A case should be created to approve the Opportunity.
- Open the case, click the link to the opportunity and change the stage to Closed/Won.
- Close the case.
- An email (Approval) should be received at the email address you specified.
Test 2 – Rejection
- Run the Credit Card Application flow (debug mode is fine) and enter a new record. Choose the 5k credit limit and any card type.
- A case should be created to approve the Opportunity.
- Open the case, click the link to the opportunity and change the stage to Closed/Lost.
- Close the case.
- An email (Rejection) should be received at the email address you specified.
Test 3 – Automatic Approval
- Run the Credit Card Application flow (debug mode is fine) and enter a new record. Choose the 2k credit limit and the Astro card type.
- An email (Approval) should be received at the email address you specified.
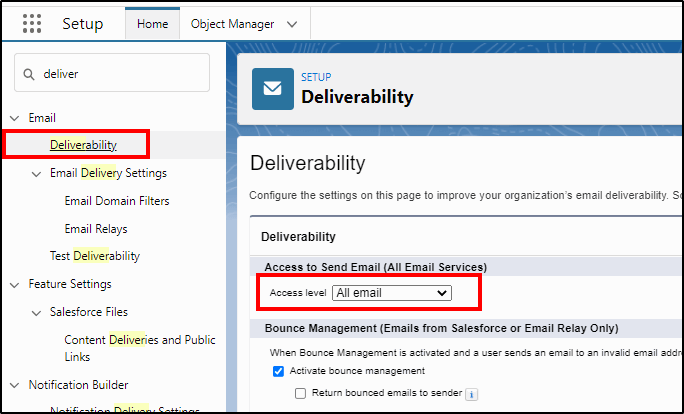
Note: If emails are not received, check you have email deliverability enabled:

————————– end —————————