HTTP Callouts from Salesforce Flow
HTTP Callouts from Salesforce Flow is a new Salesforce Winter ’23 feature.
Allowing API calls to be configured and used from within flows, perfect for integrating external data into a flow and enriching Salesforce records.
The inspiration for this article comes from this video made by Andy Engin Utkan and Josh Dayment. Thanks to these two, I was able to replicate their example and then build a completely different one. Thanks guys!
Get the weather for Lead records
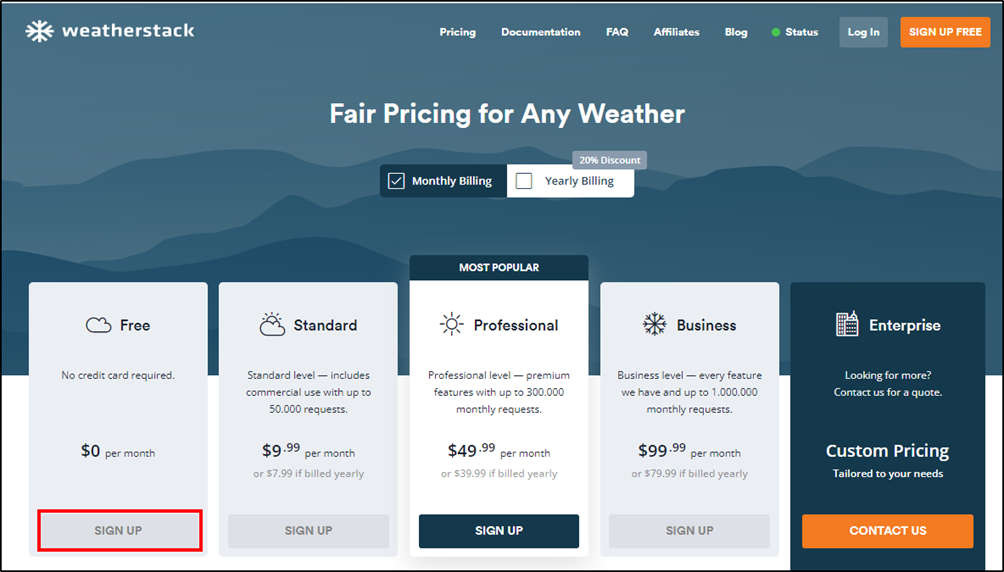
Weatherstack has a free plan with 250 API calls that is perfect for testing a HTTP Callout from flow. Pass it a city and a measurement unit and it will return the current weather.
Go here to the Weatherstack website to signup.
Select the Free Plan:
Sign up for a new account
Enter your account details to create a new account.
Next, you will be taken to a dashboard that will display your new API Key:
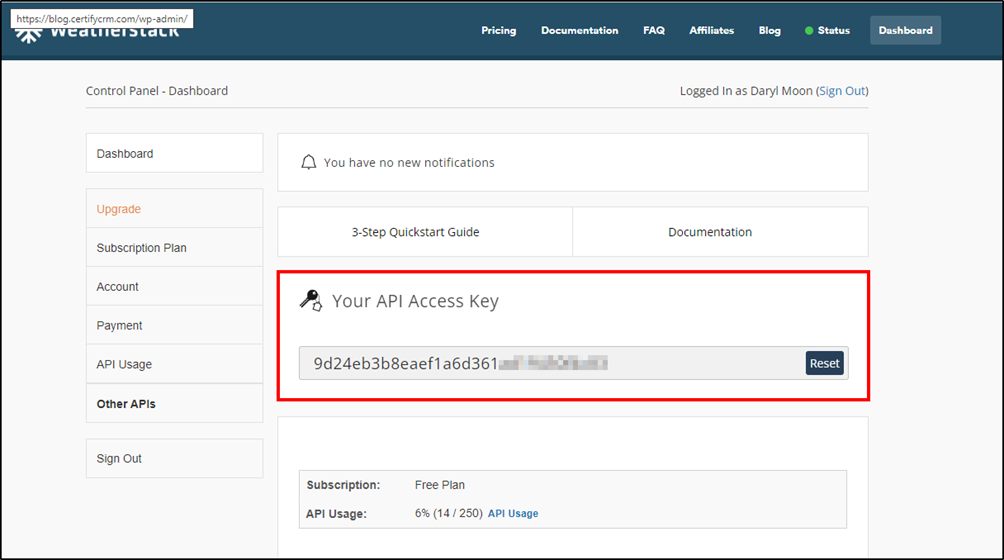
Copy this API Access Key for the next step.
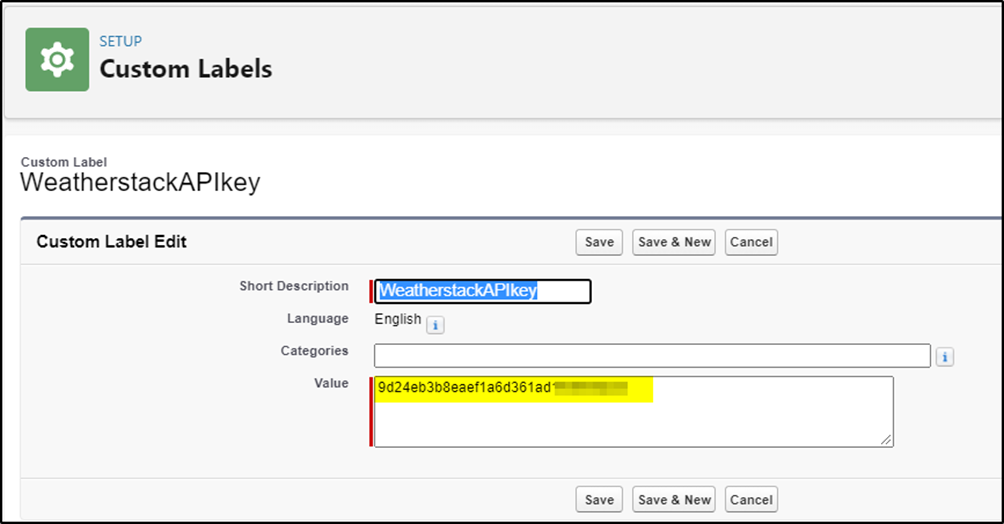
Create a new Custom Label
Create a new custom label in Salesforce to store this API Access Key
(Setup -> Custom Labels)
Create a new custom label and paste your new API key into the value field. You will use this to pass the key value to the HTTP Callout in your flow. (Every key is different so don’t attempt to use mine)
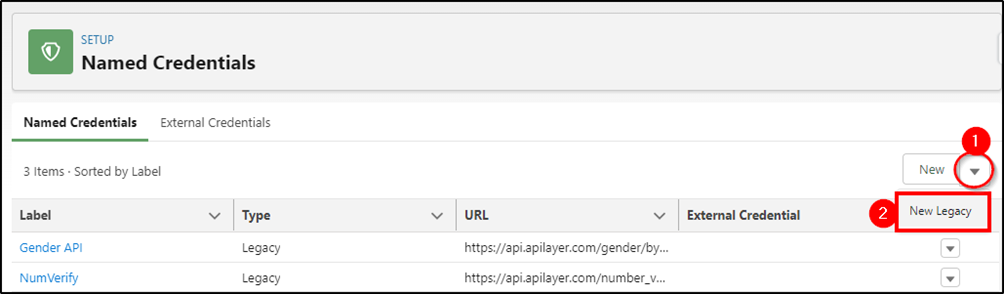
Create new Named Credential for this API Service
This is to setup the API endpoint (where the call is going to) and how the authentication will work.
(Setup -> Named Credentials)
Select New Legacy (on dropdown arrow on right)
Complete as follows:
Add a Label and click tab to auto populate the name
Enter the provided URL: http://api.weatherstack.com/current
Be sure to select all three Callout Options.
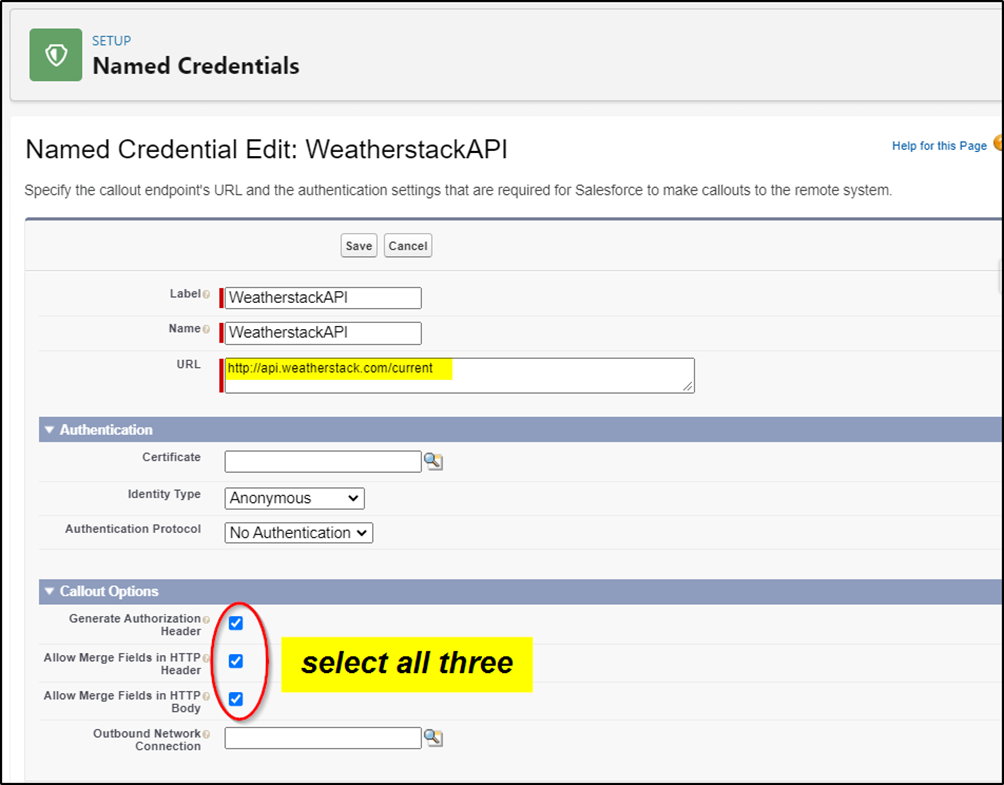
Save to complete.
Create a Screen Flow
You will use a simple screen flow triggered by a button on the lead record to display the current weather for the city of your lead record.
New -> Screen Flow
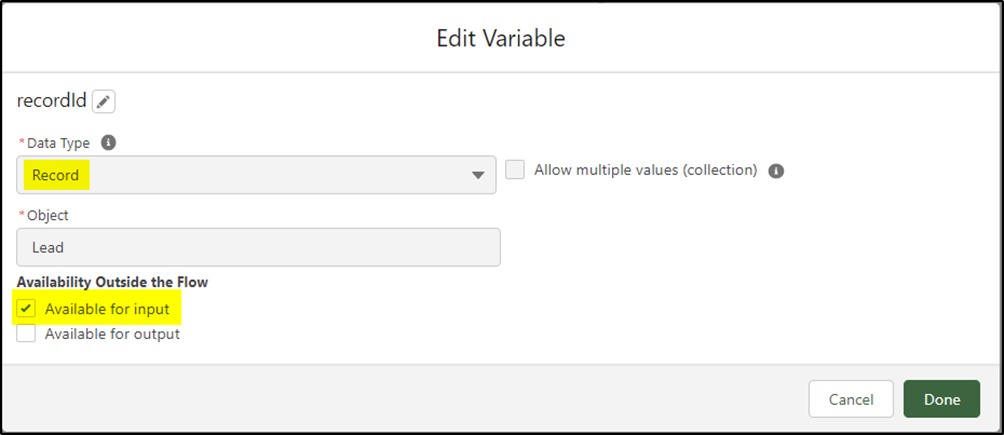
Create a new variable named recordId that will be used to pass the current lead record into your flow.
Data Type = record
Object = lead
Available for input = checked
Add a new Action to the flow
Add a new Action to the flow:
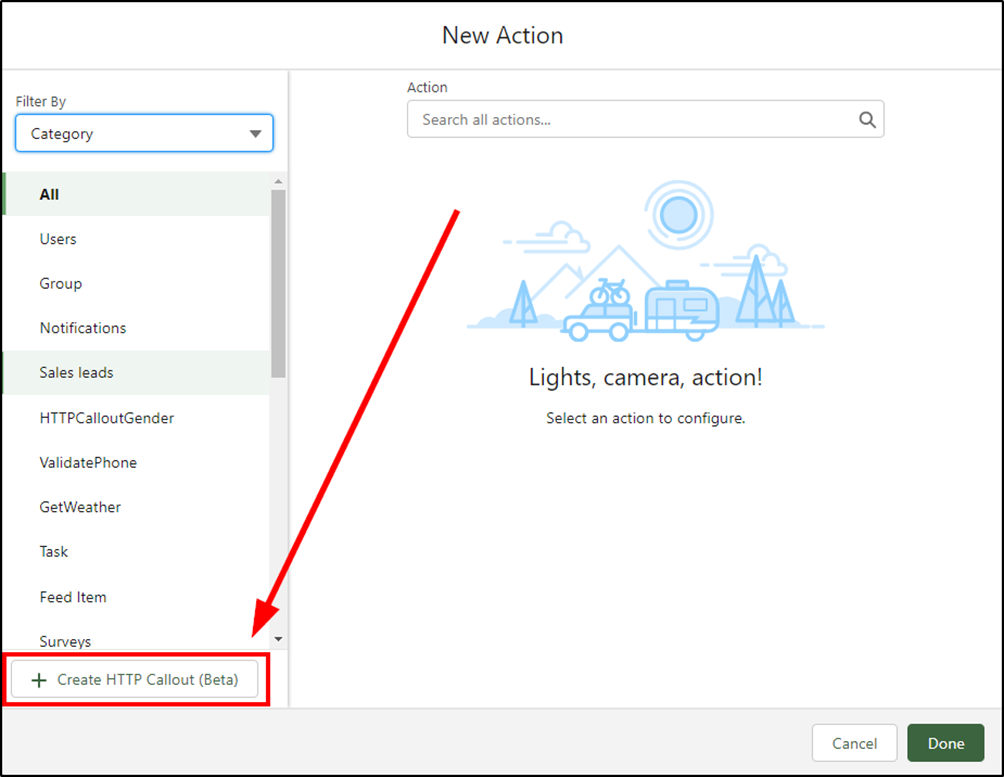
Note: If you do not see this “Create HPPT Callout (Beta)” then you don’t have a preview org or your developer org has not been upgraded to Spring 23 yet.
Give this new HPPT Callout Action a name (1) and select the Named Credential you created earlier (2).
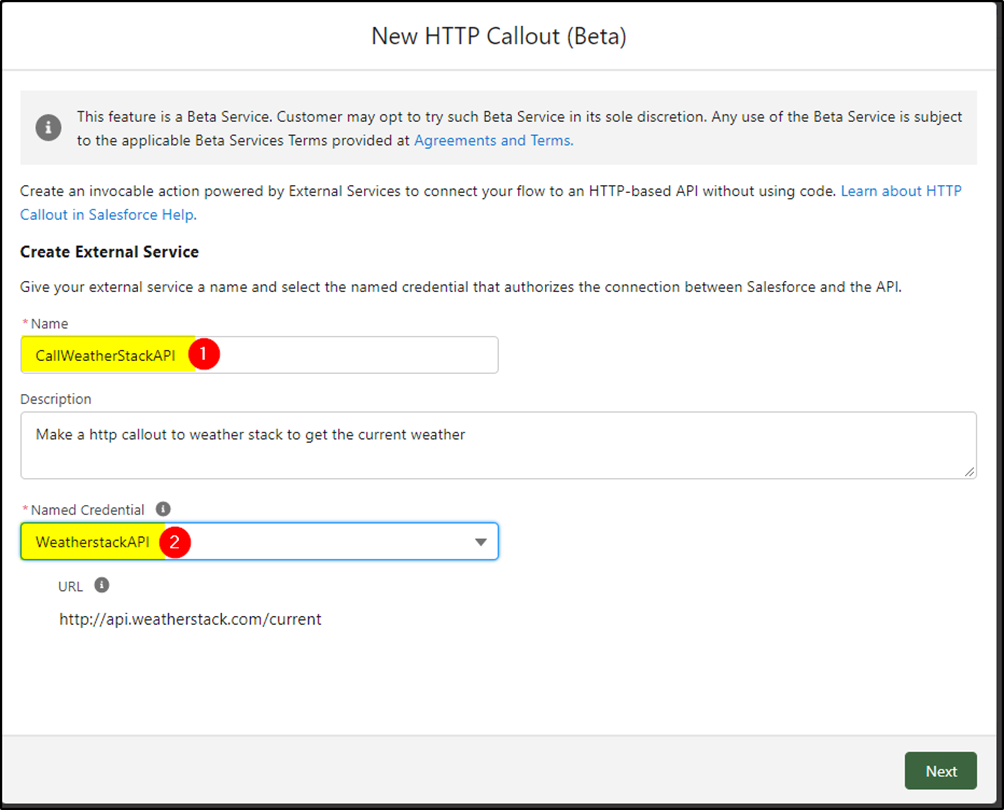
Click Next
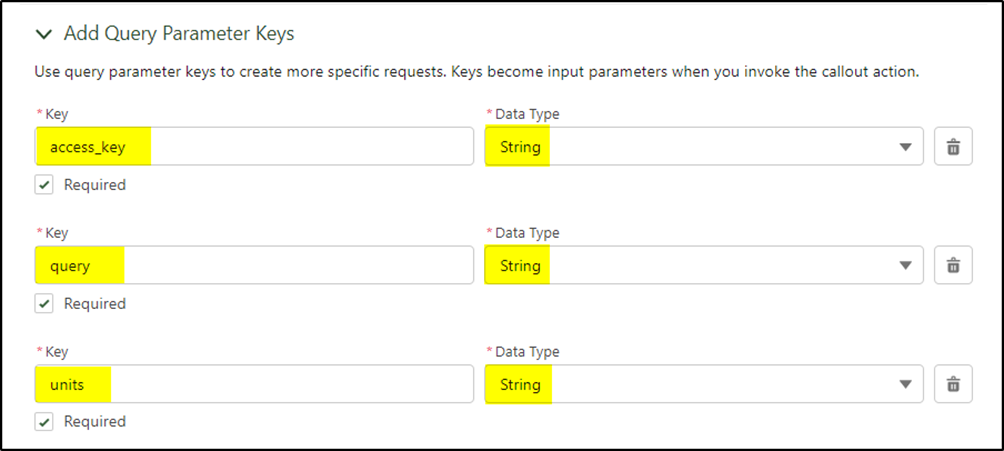
Populate params
Now you will populate the three parameters you need to pass to the API:
- access_key
- query
- units
All are defined as strings and set to required:
You are still not ready to click DONE! There is one more thing to do:

You need to provide Salesforce with a sample response of what the reply from the API will look like. This way the fields returned (in JSON format) will all be nicely formatted for you to easily use in flow.
In the documentation for Weatherstack, they provide a sample API response but it was missing one new parameter and sometimes caused the flow to crash. I have updated the response with the new parameter so use this one below:
API Response
{
“request”: {
“type”: “City”,
“query”: “New York, United States of America”,
“language”: “en”,
“unit”: “m”
},
“location”: {
“name”: “New York”,
“country”: “United States of America”,
“region”: “New York”,
“lat”: “40.714”,
“lon”: “-74.006”,
“timezone_id”: “America/New_York”,
“localtime”: “2019-09-07 08:14”,
“localtime_epoch”: 1567844040,
“utc_offset”: “-4.0”
},
“current”: {
“observation_time”: “12:14 PM”,
“temperature”: 13,
“weather_code”: 113,
“weather_icons”: [
“https://assets.weatherstack.com/images/wsymbols01_png_64/wsymbol_0001_sunny.png”
],
“weather_descriptions”: [
“Sunny”
],
“wind_speed”: 0,
“wind_degree”: 349,
“wind_dir”: “N”,
“pressure”: 1010,
“precip”: 0,
“humidity”: 90,
“cloudcover”: 0,
“feelslike”: 13,
“uv_index”: 4,
“visibility”: 16,
“is_day”: “yes”
}
}
Copy the text above and paste into the Sample JSON Response as shown below (1)
Then click Review (2)
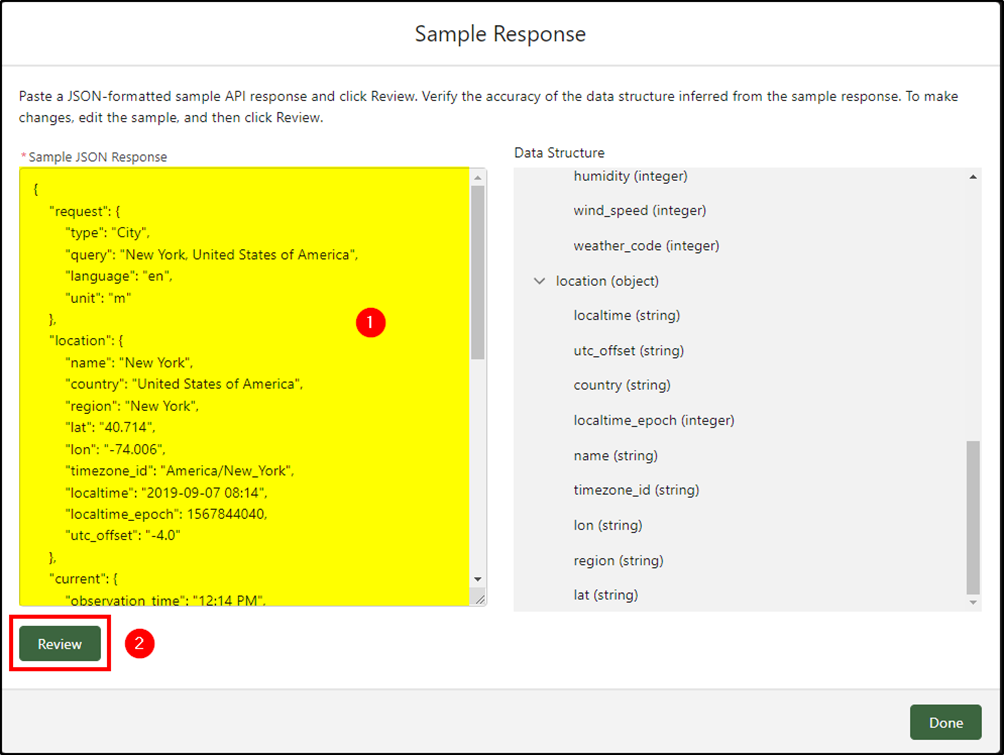
If the response is correct then the Data Structure will be displayed on the right.
Click Done
Configure HTTP Callout for use in this flow
Now the HTTP Callout has been defined, you can configure it for use in this flow:
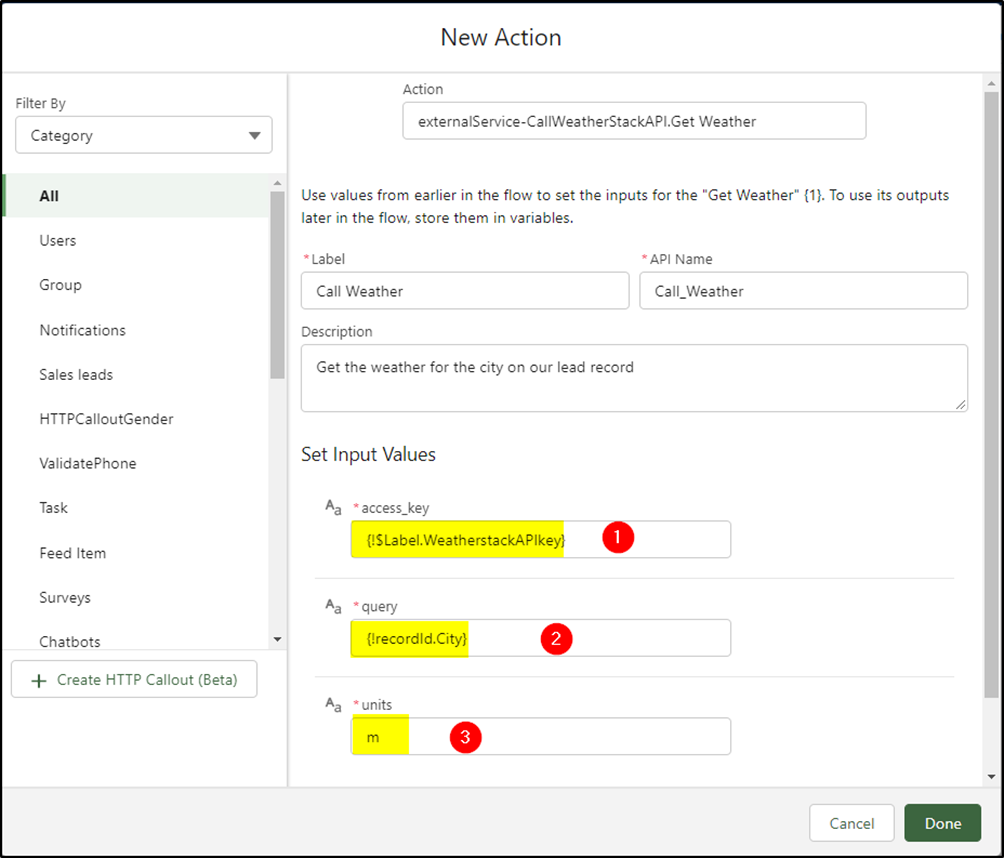
Note the following:
Access_key – (1) this is the label that you setup earlier with your API Key
Query – (2) here you use the city value from your lead record
Units – (3) you can use “m” for metric units or “f” for Fahrenheit units
Next, add a Screen Element to display the results
Add a Display Test component inside this screen:
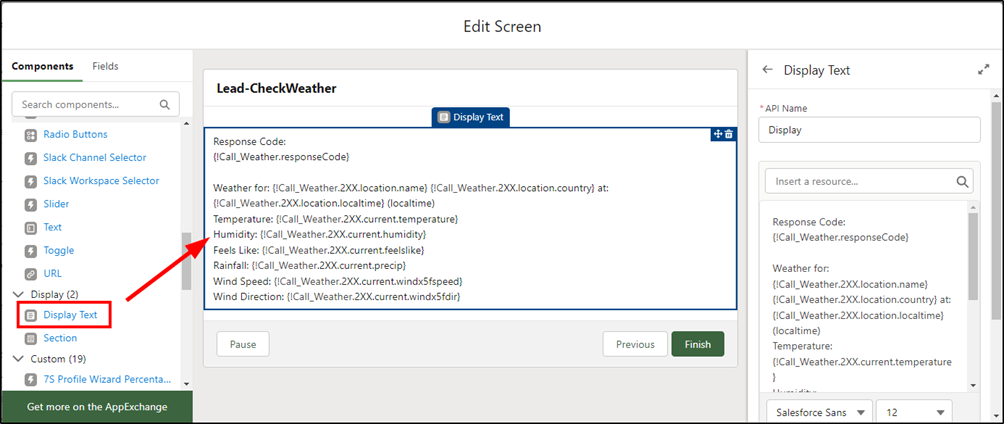
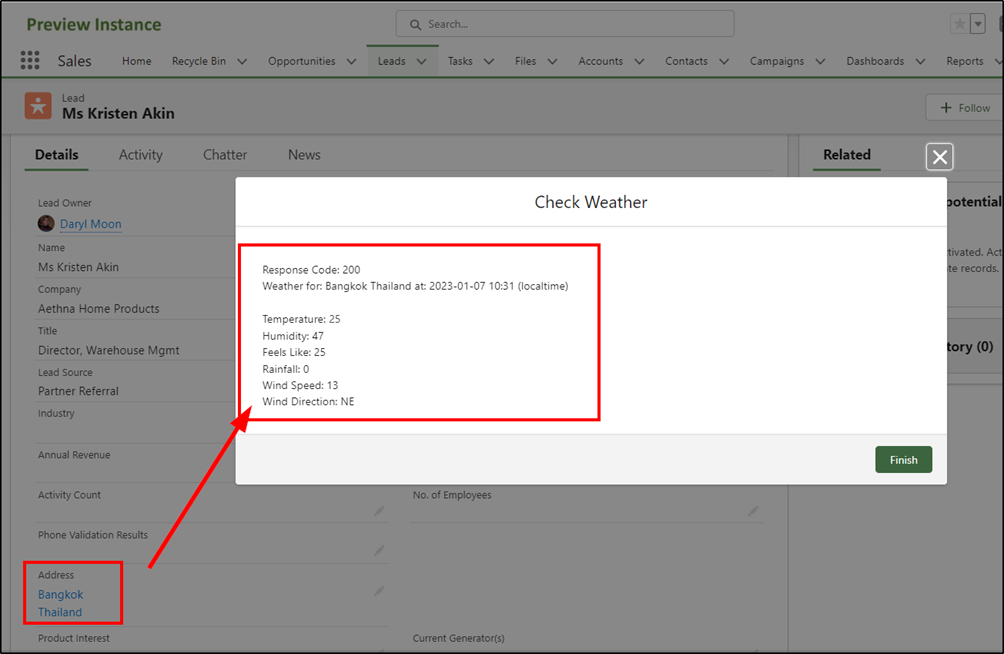
Here’s the text you need to create (unfortunately you can’t just cut and paste this in)
Response Code:
{!Call_Weather.responseCode}
Weather for: {!Call_Weather.2XX.location.name} {!Call_Weather.2XX.location.country} at: {!Call_Weather.2XX.location.localtime} (localtime)
Temperature: {!Call_Weather.2XX.current.temperature}
Humidity: {!Call_Weather.2XX.current.humidity}
Feels Like: {!Call_Weather.2XX.current.feelslike}
Rainfall: {!Call_Weather.2XX.current.precip}
Wind Speed: {!Call_Weather.2XX.current.windx5fspeed}
Wind Direction: {!Call_Weather.2XX.current.windx5fdir}
Your finished flow should look like this:
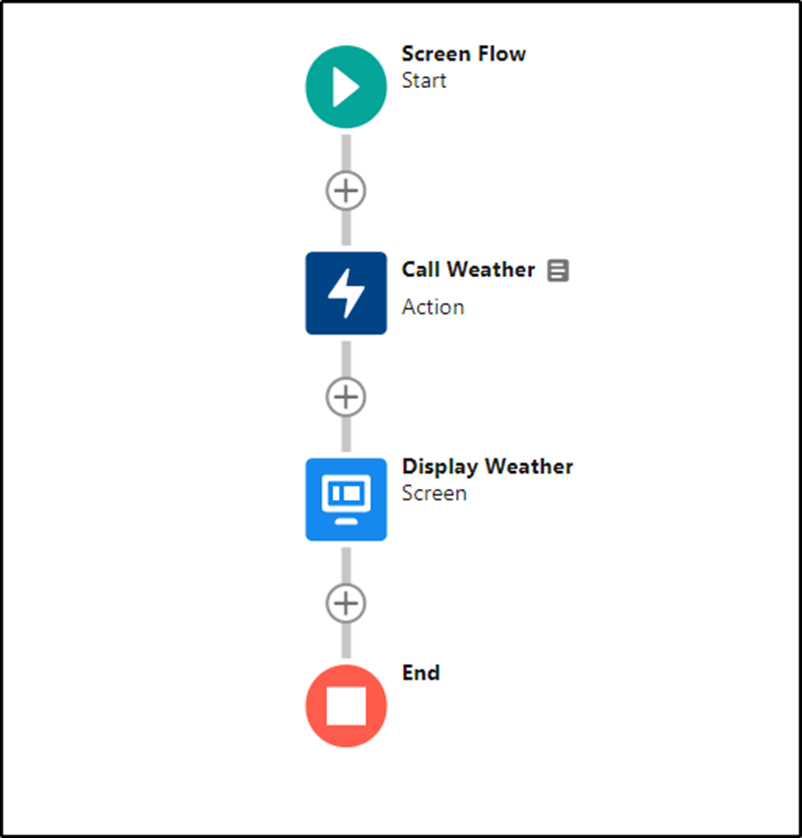
Save and activate the flow
Run it in debug mode to test it works (select a lead in the recordId field)
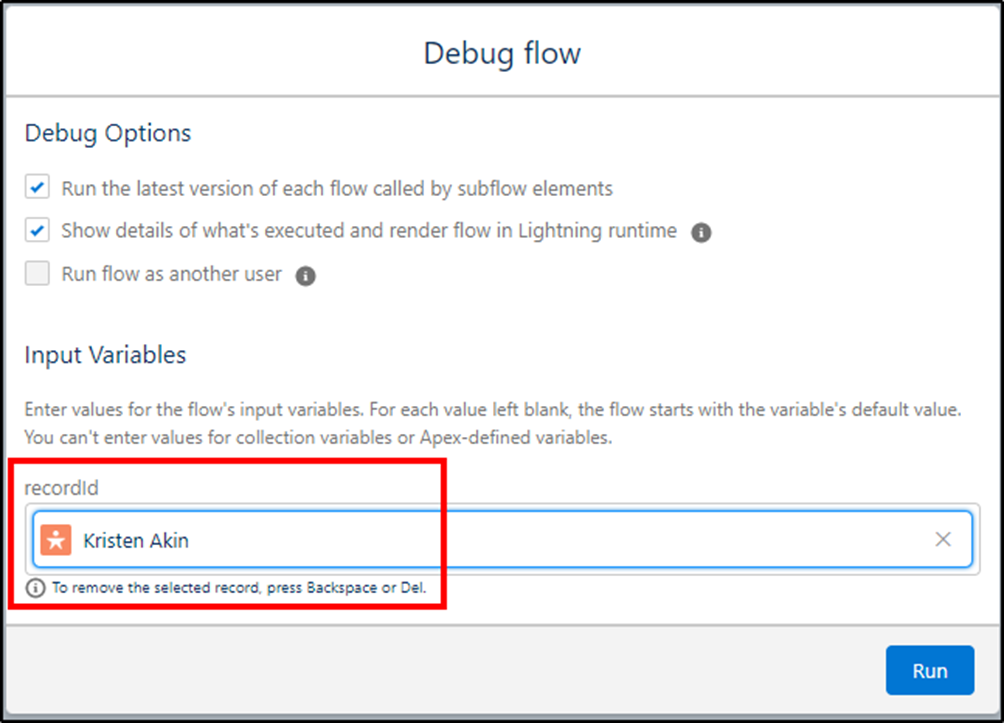
Check for values returned here:
A response code of 200 is a success!

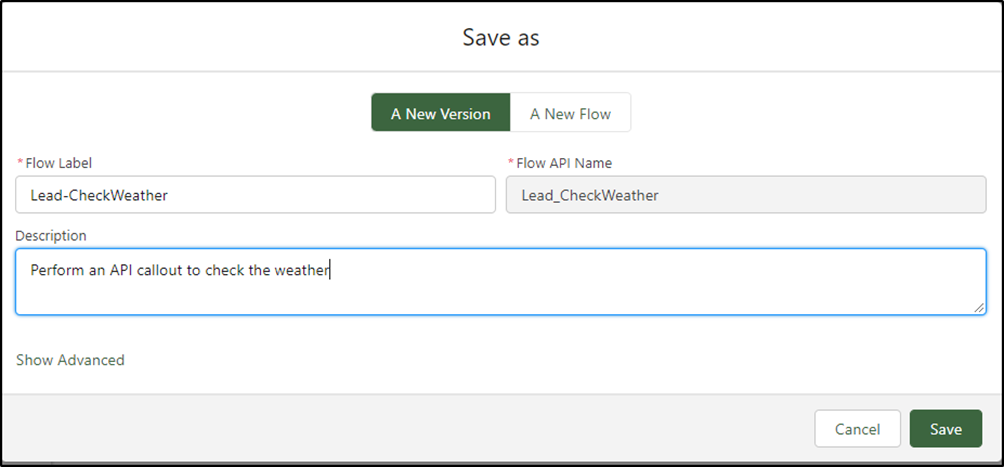
Save and name the flow
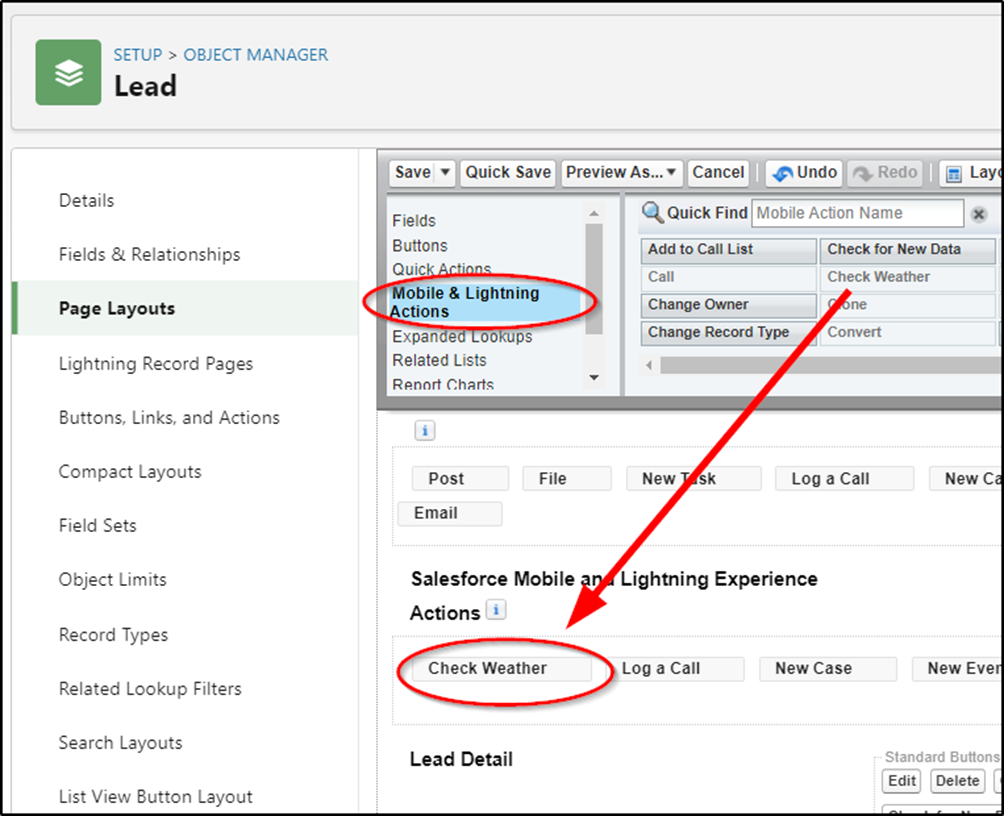
Next, create an Action on the Lead object to run the flow

Finally, put the button on the Lead page Layout
Open a lead record (make sure they have a city value in their address)
Click the Check Weather button:
Remember, you only have 250 free API calls on the free account so once these run out you will get an error in your response code indicating this. Don’t use the free account in production you will run out of free calls real quick!
You can find many free (and paid) APIs at https://ApiLayer.com to try for yourself by applying the same principles shown above.

Awesome walk through, thanks for the effort. A side benefit was Named Credentials – first example that actually worked so thanks again on the side.
I just came here to say hi. Nice post. Thank you for the shout-out.
This is great! Do we have an idea when they will be releasing POST method abilities?
I suggest you watch TrailheadDX, starting with the Automation Keynote & Insights: Build Automated Experiences with Salesforce Flow, March 8th 9:30-11:00am PST on https://www.salesforce.com/plus/ whey may indicate when this is coming.