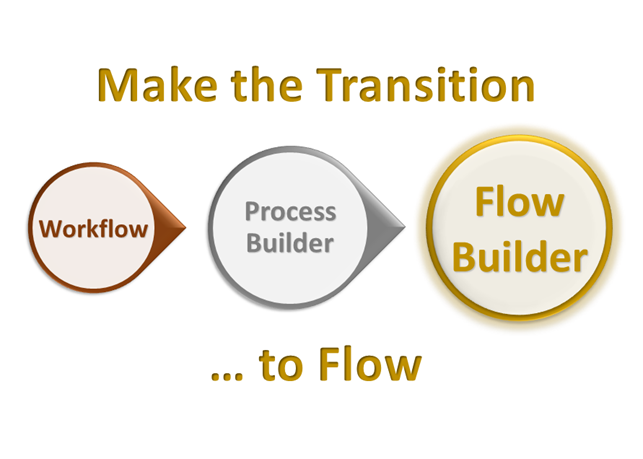
Transition to Salesforce Flow
(Part 1 – Why and How do I get there?)
With Salesforce concentrating its future development efforts on Flow, it’s time to take a good look at the reasons why Flow should be your no-code automation tool of choice on the Salesforce platform.
Why Choose Flow?
There are three key reasons to choose Flow:
- Performance
- Architecture
- Future
Better Performance
Performance tests conducted by Salesforce indicate that Before Save Flows can improve performance by 10-20x over Workflows or Process Builder.
Salesforce analyzed the actions executed by Workflows, Process Builder, and Flow by customers in April 2020. Of the 150 billion transactions executed, 100 billion (66%) were for same record updates. If converted to Before Save Flows these actions would have a significant performance improvement.

Check out this great article by Luke Freeland on benchmarking performance that compares triggers, Flow, and Process Builder.
https://metillium.com/2020/10/salesforce-record-automation-benchmarking/
Better Architecture
Workflow rules and Process Builder use a different runtime environment to Flow and will never match Flow’s faster performance and lower resource consumption. The start-up phase for both Workflow and Process Builder is inefficient and wasteful of resources.
In addition, Salesforce is concentrating its efforts on Flow performance, debugging, management and deployment which will not benefit either Workflow or Process Builder.
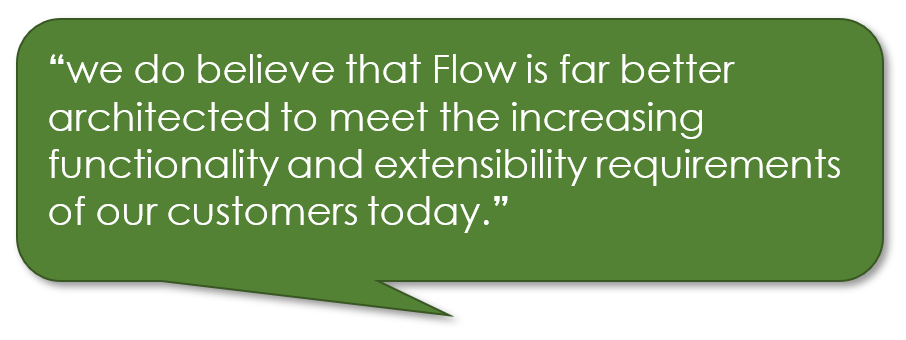
Future Development
Salesforce has recently made it pretty clear that the future for no-code automation is Flow. This does not mean that Workflow and Process Builder are going to disappear any time soon.
What this does mean is that the future development of new features will be largely around Flow. They will continue to support Workflow and Process Builder but what you have today in functionality terms is what you will have for the next several years with no improvements either planned or in development.
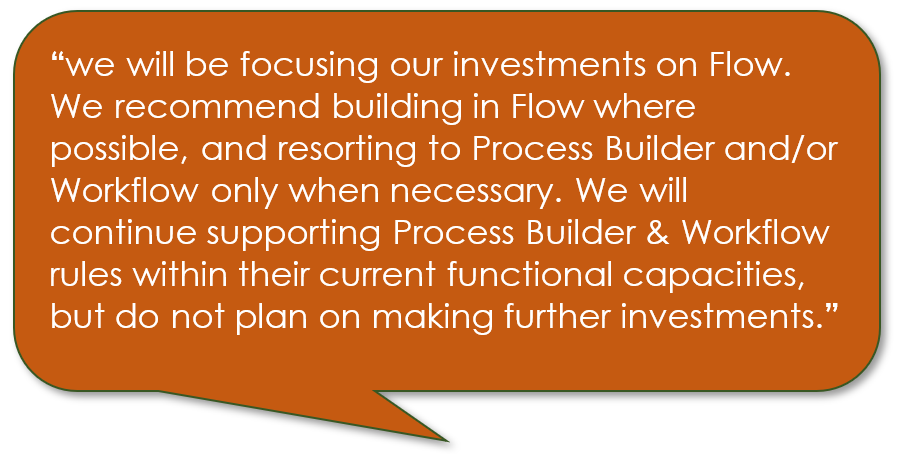
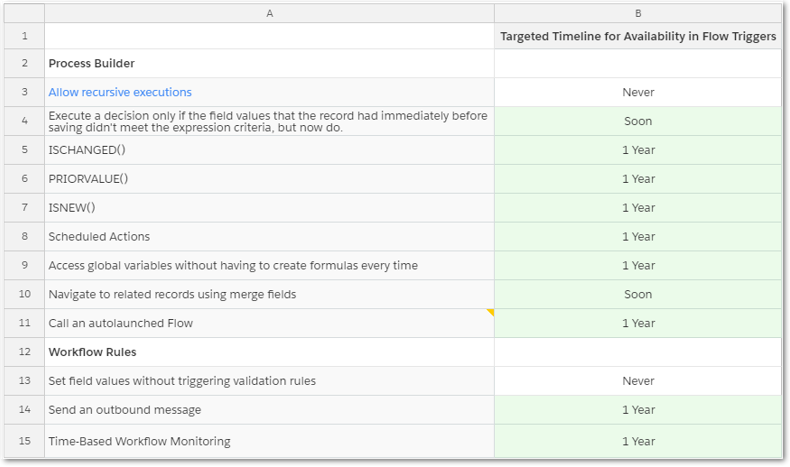
The roadmap for Flow is to match and exceed the features of Workflow and Process Builder. There are still a few shortcomings where functionality does not yet match but these are on the roadmap for development over the next 12 months.
How do I get there?
So, if I am using Workflows and Process Builder now, how do I move to Flow?
There are a number of steps to follow:
- Upskill
- Target Selection
- Tool Selection
- Identify Actions
- Start Small
- Build on your success
Upskill to Flow
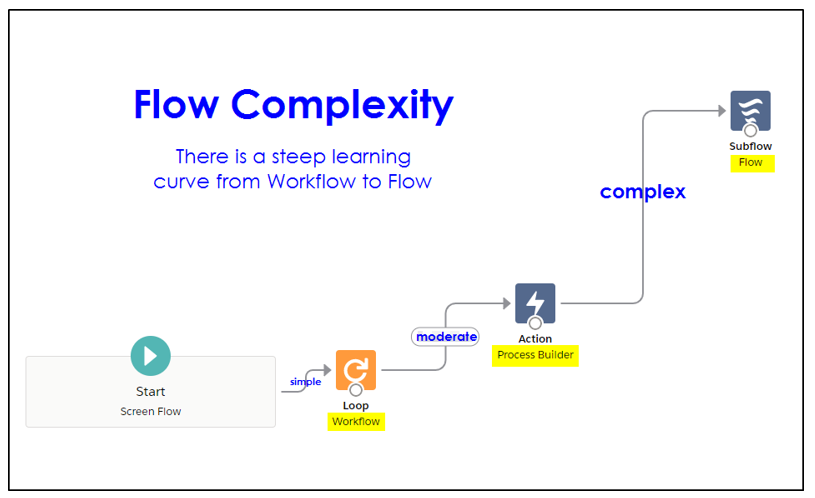
If you are already comfortable creating Workflows and building processes with Process Builder, you will find the initial learning curve to move Flow is a steep one. Many of the functions that were done for you in Workflows and Process Builder are done differently in Flow. You may need to retrieve records, assign values and update those records; however, you have much greater flexibility and capability with Flow.
If you need to read many related records from several different objects to perform a transaction you can do that with Flow. Imagine building a wizard like app in Flow that reads Account, Contact and Opportunity records and then displays the key data for further input or update.
You also have the capability of asking the user for input. You can retrieve records and then ask the user what they want to do next, perhaps based on values in those records.
Select your Target
Salesforce recommends a single tool be used for your automation and a single process for each object. While this is not always possible, it should be a target that you aim for.
There are exceptions to this rule, especially in a large complex organisation and you may want to explore the approach listed below:
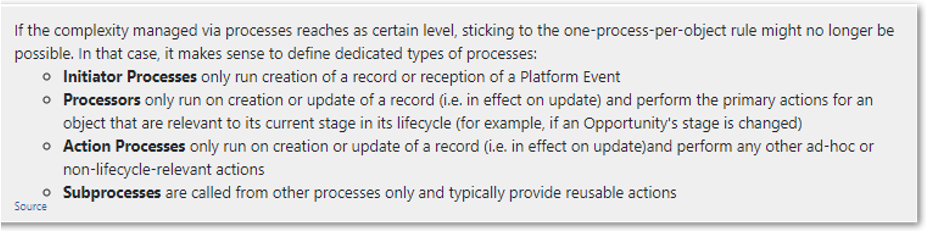
What you don’t want is a mixture of Workflows, Process Builders, Flows and Apex Triggers all updating the same object. The problem is not just the additional performance overhead every time a user creates or updates a record but determining the order of execution.
This means which one will fire first? With multiple automation tools or multiple Workflows, Processes or Flows on an object, you have no guarantee which one will execute first.
Perhaps the best starting point is to select an object with a small number of workflows and work towards combining them into a single Process Builder or Flow.
Select your Tool
While you have a choice of three no-code automation tools to choose from, Process Builder or Flow Builder should be your top candidates.
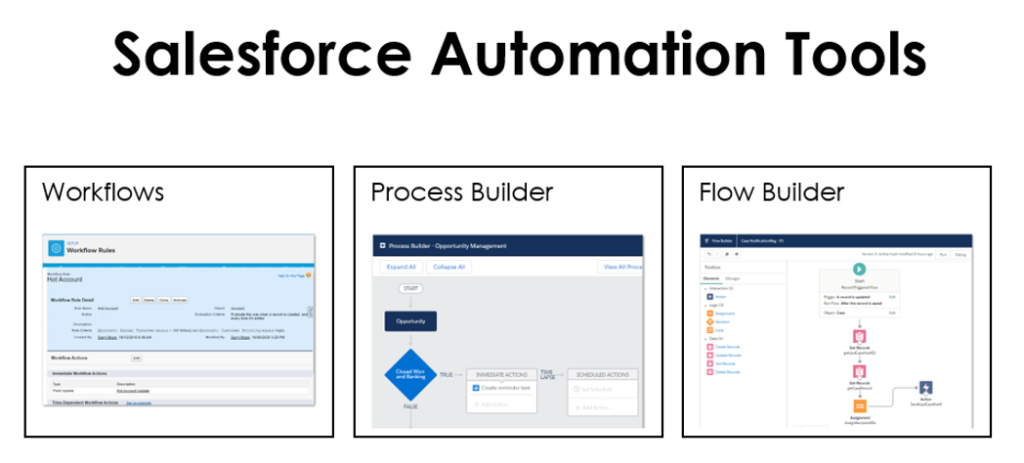
We recommend you only use Process Builder as a bridging step towards Flow if you are not yet experienced building flows.
If you are already comfortable building Flows then Flow should be your tool of choice.
Use Process Builder when you need ISNEW, ISCHANGED, PRIORVALUE functions. These should be available in Flow in the next 12 months (by the Winter 22 release).
Note: There may still be situations where your automation is very complex or needs to operate on a large number of records. In this case, the best tool may be an Apex Trigger. You may need help from an experienced developer.
Identify all the Actions required
Having selected your target object and preferred tool, create a list of your existing Workflows, Process Builders and Flows that operate on that object.
Take a close look at each action and complete the following table for your selected object:
Lead Object Automations:
| Tool | Name | When | What | How | Description |
| Workflow | UpdateRating | Create | Update Rating | Revenue > $500,000 and Lead Source = Partner Referral | Update rating to Hot if conditions are met |
| Workflow | NotifySalesMgr | Create | Send Email | Industry = Banking | Email Sales Manager if industry = banking |
| Process Builder | Add Task | Update | Add task to call Lead within 3 days | Lead Source = Web and Status = Working – Contacted | Create a task to place a follow up call to the lead |
Start Small
Start with a very simple Flow so you understand the process of creating, running and debugging a flow. It will help your confidence to get over the steep learning curve and get you motivated to climb the next step.
The UpdateRating workflow in the table above would be a good starting point for your first flow.
Flow 1: Update Rating for a Lead
Let’s create a simple flow:
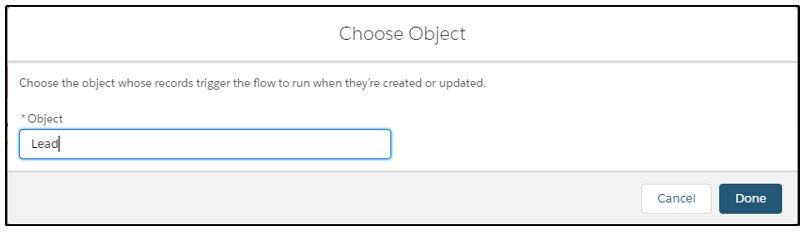
Start by creating a new flow of type: Record-Triggered Flow.
Trigger the Flow When: A record is created
Run the Flow: Before the record is saved

Select the object: (Lead)
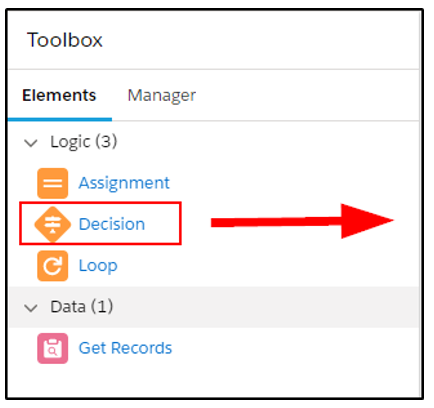
You will need two decisions and one assignment element for this flow
Drag a Decision element to the canvas:
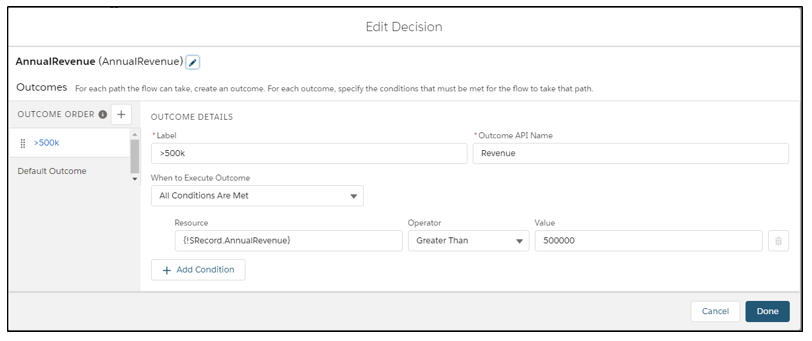
Configure the first decision to check: is the Annual Revenue greater than $500,000?
Drag another decision element to the canvas:
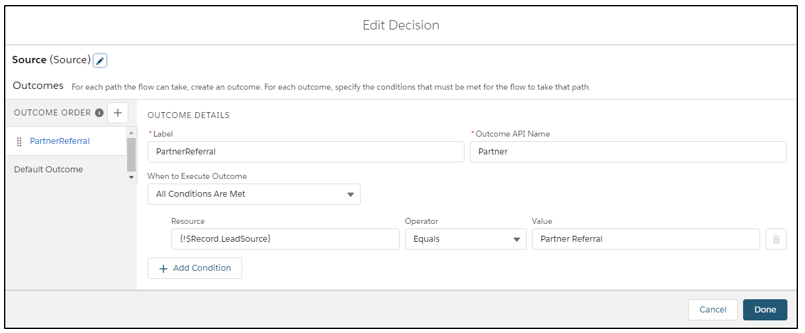
Configure the second decision to check: is the Lead Source = Partner Referral?
Drag an Assignment element to the canvas:
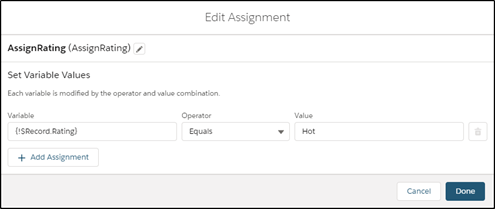
We will now configure the field we want updated (Rating).
Join up the elements:
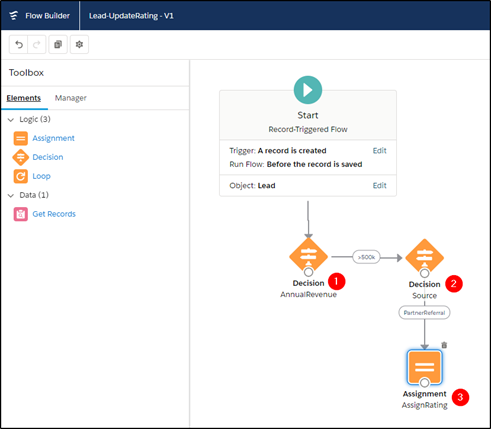
Save your flow and activate it.
Notice how we did not need to get the lead record or save the record?
The flow will get the record automatically for us as it is triggered when the record is created. Because it is a before save flow, the flow is actually run before the record is saved by the user. No need to do anther save, it is all done in one transaction.
This simplicity and before save feature are what makes this flow execute quickly.
Test your flow:
Now go back to your Sales App or any app that has access to leads and create a new lead record. Enter a number > $500,000 for Annual Revenue and select Partner Referral as the lead source. Save the record and check that the rating has been set to Hot by your flow.
If this was successful, congratulations you have built your first flow!!
Build on your success
Now you have conquered your very first flow, tackle something a little more complex and gradually build up your skills and confidence. Before long you will be over the hump and on your way to tackling more complex flows.
In part 2 of this two-part article, we tackle a more complex flow that gathers feedback from a customer with a simple form and creates a customer feedback score.
Part 2 published now:
https://blog.certifycrm.com/make-the-transition-to-flow-part2/
Get more great training resources with our online training material that provides everything you need to get certified in the following:
- Salesforce Administrator
- Salesforce Platform App Builder
- Salesforce Advanced Administrator
- Salesforce Sales Cloud Consultant
Visit our online training site at CertifyCRM.com

Trailhead resources to get started with flow:
Trail: Build Flows with Flow Builder
https://trailhead.salesforce.com/en/content/learn/trails/build-flows-with-flow-builder
Trail: Automate Your Business Processes with Lightning Flow
https://trailhead.salesforce.com/en/content/learn/trails/automate_business_processes
Module: Lightning Flow for Service
https://trailhead.salesforce.com/content/learn/modules/service_lightning_flow_for_service
One Comment